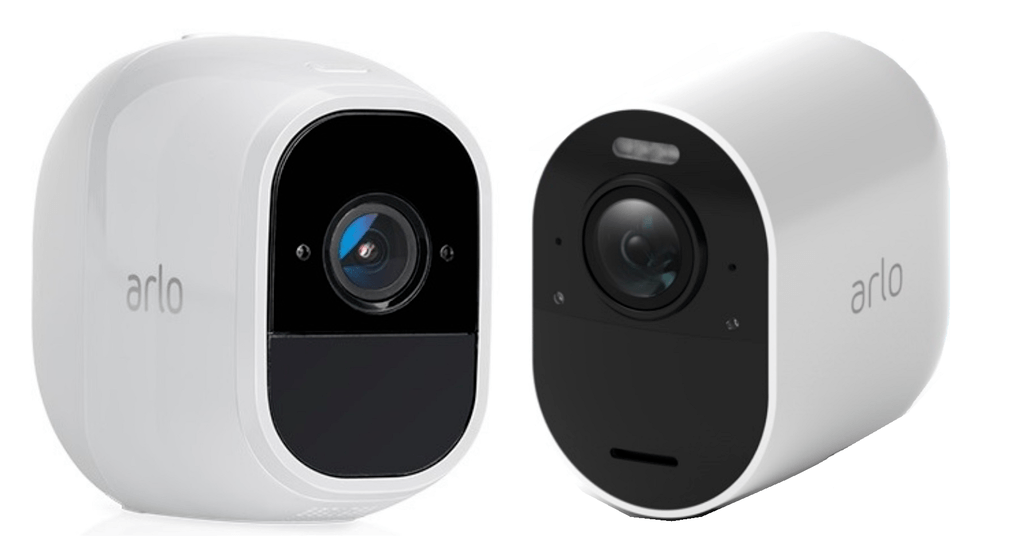
Arlo has quickly become a big name in the security camera market. As they continue to pull away from their parent company, Netgear, Arlo continues to raise the bar. With the success of the Arlo Pro 2, the company then took user complaints and concerns to heart and built the Arlo Ultra.
The main issue with the Arlo Ultra is that is might be too much for most consumers. However, the Ultra is a better camera system than the Pro 2, but is it better for you? This review will look at both Arlo systems, compare their differences and similarities, and help you decide which model is ideal for your unique situation.
Contents
Differences between Arlo Pro 2 and Arlo Ultra
There are several differences between the two models, and most are quite substantial. Let’s review those differences now.
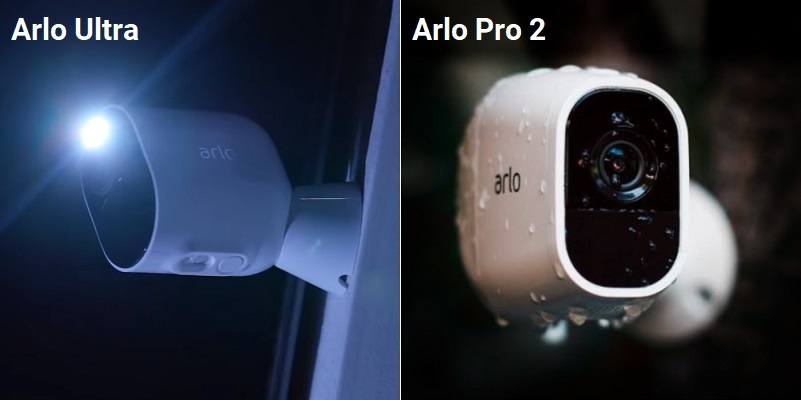
- The Arlo Pro 2 records in full 1080p resolution while the Arlo Ultra records in 4k UHD.
- Cloud Storage. Both Arlo systems use the Arlo Smart cloud storage service, but only the Arlo Pro 2 offers the free 7-day rolling storage option.
- Field of View. The total viewing angle of the Ultra is much larger (180 degrees) than the Pro 2 field of view (130 degrees).
- Battery charging. The Arlo Pro 2 uses a USB charging cable for recharging the batteries. The Ultra uses a magnetic cable to recharge the batteries inside.
- The Ultra comes equipped with a spotlight while the Pro 2 doesn’t have a spotlight.
- The siren on the Arlo Pro 2 is embedded in the hub while the Ultra’s siren is in the camera itself.
- High Dynamic Range (HDR). HDR is a camera feature that helps make the images clear. The Ultra has HDR, and the Pro 2 does not.
- The latest hub, Arlo SmartHub, can make use of the Ultra and Pro 2 cameras. However, the Arlo hub will make use of the Pro 2 camera but cannot support the Ultra.
- The Ultra model has two microphones to help the two-way communications clarity. The Pro 2 model only has a single microphone.
Similarities between Arlo Pro 2 and Arlo Ultra
Because Arlo makes both models, and they are both wireless security cameras, there are bound to be some similarities. Let’s see what those are now.
- Wired or wireless mounting. You can use the wireless feature to mount the cameras anywhere you need them or plug them in with the charging cables to keep them wired.
- Mobile app. Both the Ultra and Pro 2 models make use of the Arlo app for setup, control, and viewing.
- Smart home integration. You can connect both models to Alexa, Google Assistant, and coming soon (to Pro 2) Apple HomeKit.
- Night vision. Each of the camera options has LED infrared night vision capabilities.
- Motion detection. You are able to create zones and use enhanced motion detection through both models.
- DIY install. Arlo is infamous for its quick and simple installation procedure.
Specifications Chart
Now we get a look at the two models side by side to see what they do and don’t offer compared to each other.
| Arlo Ultra | Arlo Pro 2 | |
| Battery | Magnetic Charging | USB Charging |
| Battery Life | 6 months | 4 months |
| Power Options | Battery, Hardwired | Battery, Hardwired |
| Outdoor Mount | Yes | Yes |
| Operating Temperatures | -4 – 113 degrees F | -4 to 113 degrees F |
| Continuous Recordings | Yes | Yes |
| WiFi | Yes | Yes |
| Mobile App | Yes | Yes |
| Voice Commands | Yes | Yes |
| Smart Home Integration | Yes | Yes |
| Night Vision | Yes | Yes |
| Resolution | 4K | 1080p |
| Field of View | 180 degrees | 130 degrees |
| Motion Detection | Yes | Yes |
| Scheduling | Yes | Yes |
| 2-Way Communication | Yes | Yes |
| Live View | Yes | Yes |
| Storage | Yes | Yes |
| USB Backup | Yes | Yes |
| Siren | Yes | Yes (in hub) |
| Price | Check on Amazon | Check on Amazon |
Comparing the Arlo Pro 2 to the Arlo Ultra
Now we get to the meat of the article, and why you are here. Which model is better suited to your needs and situation? We will compare the Ultra and the Pro 2 side by side to find out.
Recording and Viewing are Vastly Different
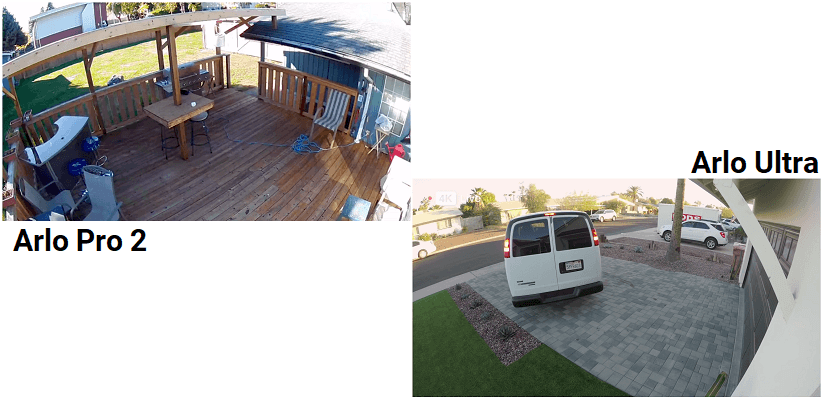
The two models here are security cameras. When motion is detected, they will turn on, begin recording and send you an alert. How they go about this, though, is different. The Arlo Pro 2 records in 1080p HD with a 130-degree field of view.
For the most part, this is fine; you can view 1080p on most devices and televisions, computer monitors, etc. The clarity is well defined, and colors are clear when there is enough lighting. You can view the alert through the mobile app, or via voice command capable devices (discussed later on).
The Arlo Ultra, on the other hand, records in vibrant 4k resolution. It also uses a feature called High Dynamic Range, or HDR. 4K, along with HDR, results in a crystal clear image without motion blur or color bleed, regardless of lighting. The main issue here is that viewing in 4k requires a 4k capable mobile screen, tablet, computer, or TV. If you don’t have a 4k device, the resolution will be down-scaled.
Bottom Line: The Ultra wins, but you must have a 4k device to get the most out of the recording and viewing clarity it offers.
Mobile App and Smart Home Integration
The Arlo app has recently gone through a big change. When you look in your respective app store (Android or iOS), you may find there are two apps. Arlo (Legacy) is the old app that is no longer updated, supported, or used. This stems from Arlo’s attempt to be their own entity away from their parent company, Netgear.
The new Arlo App will run all Arlo devices, including the Pro 2 and Ultra cameras and hubs. With the app, you can run the initial setup, add more cameras, view the live feeds, set motion detection zones, and get alerts.
While there isn’t much difference in the Ultra and Pro 2 in the way they integrate with the mobile app, there is a slight difference in the other smart home integration they can pair with. Currently, both models will work with Amazon Alexa, Google Assistant, IFTTT, Wink, and SmartThings.
As of this writing, the Arlo Pro 2 is compatible with Apple HomeKit. The integration is due to be released for the Arlo Ultra soon. It was expected by Christmas 2019, but it looks like it may be closer to Valentine’s day 2020 release instead.
[easyazon_image align=”center” height=”500″ identifier=”B075P84FH2″ locale=”US” src=”https://smartrobotichome.com/wp-content/uploads/2020/01/41WOrE1TNNL.jpg” tag=”srh-easyazon-20″ width=”500″]Bottom Line: The Arlo Pro 2 gets a slight nudge for the HomeKit integration, but both cameras use the same app and have the same basic smart home integrations otherwise.
Spotlights and Sirens
The Arlo Pro 2 uses the Arlo Hub while the Arlo Ultra uses the Arlo SmartHub. The biggest difference here is the backward compatibility. Before the SmartHub, all Arlo hubs could pair with all Arlo cameras, regardless of version. However, because of the resolutions and needs for the Ultra (and Pro 3 camera), the Hubs needed to change.
As it stands, the SmartHub will pair with the Pro 2, but the Arlo Hub will not pair with the Arlo Ultra cameras. This is a negligible difference, though, since you should upgrade to the SmartHub. It offers better pairing, further wireless range, and has better local storage capabilities.
If you are looking to save money, the best option is to get the SmartHub and then purchase Pro 2 cameras separately. Since technology will only improve, it is wise to have the better hub and save money on cameras down the road.
The other differences are the sirens. The Pro 2 siren is in the hub, a 100dB siren that can be manually activated or linked to motion events with the cameras. The SmartHub does not have a siren in it. Instead, the 100dB siren is now embedded in the Ultra cameras themselves.
The other difference is that along with the siren; the Ultra has a spotlight as well. This is another missing feature from the Pro 2 lineup. The spotlight is a super bright LED light that, like the siren, can be manually activated or set to come on with motion detection. You also have the opportunity to make the light a blinking red LED that mimics a video recording light.
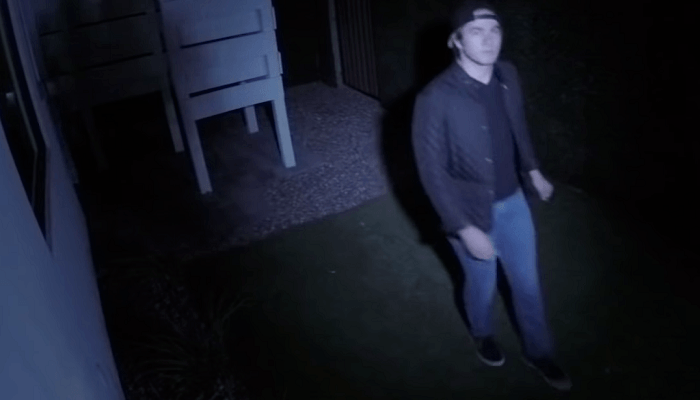
Bottom Line: The Ultra wins. The siren and spotlight being in the camera are a huge advantage for scaring off would-be intruders. The other hub advancements are worth the upgrade as well.
Cloud and Local Storage Sees a Huge Change
Both hubs have the ability to store footage and recordings locally. The Pro 2 hub has a USB dongle port that will hold your recordings up to 256GB. In the SmartHub, the USB port is replaced with a MicroSD slot that is capable of accepting a MicroSD card with a capacity of 1TB.
The Cloud storage has also changed. Because of the new Ultra and Pro 3 camera systems, the cloud services went through a small change. That change, though, has caused a lot of confusion. I will attempt to make the Arlo Smart plans more clear for you in the following chart.
| Arlo Pro 2 | Arlo Ultra | |
| 7-Day Free Cloud Recording | Yes | No |
| Arlo Smart Premiere Trial | No | 1-year |
| 2k&4k Recording | No | Yes |
| Free Plan | Yes | No |
| Premiere Plan | Yes | Yes |
| Elite Plan | Yes | Yes |
| Single-Camera Plan | Yes | Yes |
| Multi-Camera Plan | Yes | Yes |
| Continuous Video Recording (CVR) | Yes (Extra Cost) | Yes (extra Cost) |
Here is what you need to know. The Pro 2 can use the free 7-day recording service, which is suitable for most residential applications. If you go with the Arlo Smart Basic plan, it costs $3 or $10 per month (single camera or multiple).
The Arlo Ultra isn’t able to use the free plan (resolution restrictions), and you can only view live feed with continuous recording if you purchase the CVR plan, which is a monthly cost, per camera.
Further details, restrictions, and requirements can be found on the Arlo Smart knowledgebase article.
Bottom Line: With the free recording option, most homeowners will find that the Pro 2 has better cloud storage. Local storage has more to do with the hub, and since the SmartHub can sync both cameras, that is a tie.
Motion Detection and 2-Way Communications
Motion detection is accomplished through infrared heat signatures. The cameras sense the ambient temperature and look for anything that has a different heat than the surrounding area. This technology is pretty solid but does have some weak spots.
It is better at detecting motion that moves from the side, rather than head-on. It is for this reason you are requested to mount your cameras at a higher spot and off to the side of the doorway or entrance instead of over the middle.
You can use the mobile app to adjust the motion detection sensitivity on a scale of 1 to 100. The lower the number, the less motion the cameras will detect. Fine-tuning this will help prevent false alerts from things like blowing tree branches or moving cars.
Both cameras also come with microphones and speakers installed. This enables you to use two-way communications when someone enters the field of view. Once you get an alert, you can enable the microphone and speaker to hear what the person says and to respond (through the app interface) so they can hear you.
The Arlo Ultra has dual-microphones that are supposed to help eliminate echoes and faint sounds while amplifying the speaker’s voice. Depending on the quality of the speaker on your smartphone, this may or may not be noticeable.
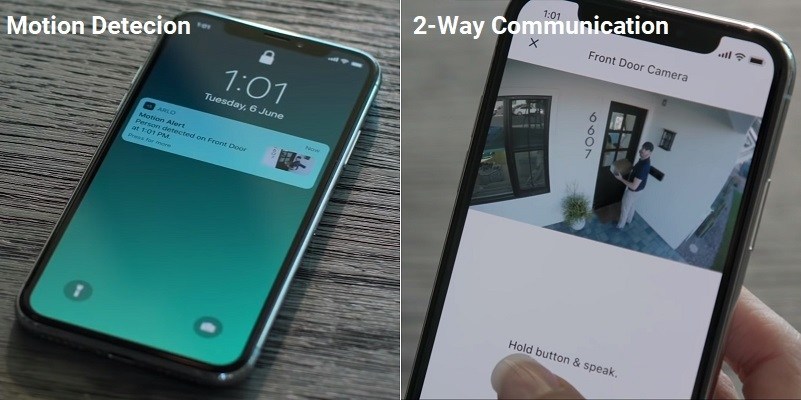
Bottom Line: Both models use the same infrared motion detection systems and the extra microphone really doesn’t add a lot of clarity. This is a tie.
Both Camera Systems offer Simple DIY Installation
Arlo is known for their simple installation and setup processes. In most cases, you can go from box to recording in under 20 minutes. While the hubs are different, and the cameras have different capabilities, the setup and installation procedures are the same.
Of course, you can use the batteries and do a completely wireless install, or you can plug the USB charger cable (Pro 2) or magnetic cable (Ultra) into the cameras an have a wired connection. In either case, the cameras will communicate over WiFi to the hubs, where recordings are stored, or transmitted to the cloud.
I will cover the basic, wireless installation and set up procedure here, so you have an idea of what you are getting yourself into.
Initial Setup Procedure
- Once everything is out of the box, you will need to connect the hub first. Connect the Ethernet cable from your modem or router to the hub.
- Connect the AC adapter from a nearby outlet to the hub and switch the hub on.
- The hub will connect to the internet and begin the setup process.
- Download, install, and sign on to the Arlo App. The app will take you through the initial setup of the hub, your internet settings, and begin searching for cameras.
- Install the batteries to power on the camera.
- Press the sync button on the camera and the hub. Once synced, the lights will stop blinking.
- The app will find the camera through the hub’s connection, and you will begin seeing a live view.
- Make sure the view is active, and your set up is complete.
Installing the Cameras
- Before you mount anything to the wall or above your doors, you need to ensure the wireless range of the hub extends to where you want the camera set up.
- Place the camera where you wish to mount it and see if the wireless signal and image are strong and visible on the app interface.
- If not, move the camera a foot or two at a time until everything works as expected. This is your mounting spot.
- Screw the magnetic mount to the wall in the location and then attach the camera to the mount.
- Using the view on the app, adjust the camera angle, and pitch until it shows the view you wish to achieve.
- Installation is complete. Repeat these steps for any additional cameras.
Bottom Line: Installation and setup can be done relatively quickly. The process is the same for both models, so this round is a tie.
Frequently Asked Questions
There are some questions which continue to come up time and again. I will attempt to answer those questions now. If you have any other questions or concerns, please feel free to use the comment section below.
Q. Do these cameras offer night vision?
A. Yes. Both cameras are capable of full-color night vision using infrared technology. While the Pro 2 is more hit-or-miss with the color aspect, you still get a clear image throughout the recording. The Ultra cameras, with HDR, have better quality, clarity and don’t lose color that often.
Q. Can I contact Arlo Customer Service if I have an issue?
A. If you are in the United States, you can call Arlo at 1-408-638-3750. For further support, they will direct to you their support center with documents, knowledge base articles, and a community forum for assistance.
Q. How do I make a warranty claim on my Arlo camera?
A. There are three basic steps for filing a claim. First you must contact technical support and if the problem is deemed a warranty issue, they will provide you with a RMA number and address. You will need to box up and ship (you pay shipping costs), the defective camera and RMA number to the address provided by tech support. You will then need to provide original proof of purchase date (receipt of purchase). The claim center will file the claim, repair or replace the product and ship it back to you.
Q. What are the Internet requirements for the Arlo cameras?
A. For the Arlo Pro 2, you will need a broadband internet connection with a minimum of 1Mbs upload speed. For the Arlo Ultra cameras and SmartHub, the minimum upload speed needs to be 2Mbs.
What I Like About the Arlo Pro 2
- Free 7-day cloud storage plan.
- Up to 6-months battery life.
- Full 1080p HD resolution fits most modern view screens.
What I Like About the Arlo Ultra
- Records in full 4k UHD.
- Siren and spotlight are located in the camera and not the hub.
- SmartHub has local storage capacity of 1TB.
Conclusion
If you want the best of the best, the Arlo Ultra is your answer. This camera boasts 4k resolution recordings, SmartHub integrations with up to 1TB local storage. You can get the Arlo Smart Elite plan with continuous video recording and instant 24/7 live view.
However, a lot of consumers find the Ultra to be a bit much for their needs and wallets. The Pro 2 used to be the camera system to beat, and for that reason, it still holds a special place in most homeowner’s hearts. The set up is simple; use is straightforward, and aside from the Arlo Pro 3, there isn’t a better, more cost-effective home security system available.
