When it comes to home security cameras two names stand above the rest: Arlo and Nest. The Arlo Q and the Nest Cam Indoor are two of the top selling, top rated and top reviewed cameras arguably ever.
In this review I will compare the two cameras side by side and pick a winner. Before I declare the top spot though, I will show you what they have in common and what is different about them. I will compare them side by side and give you detailed information about each of the features before answering the most common questions. If, however, you just want the verdict: The Arlo Q is the better choice.
Contents
Differences between the Arlo Q and Nest Cam Indoor
- The Arlo Q comes with free cloud storage of recordings, the Nest Cam Indoor has free streaming with a three hour look back.
- The Nest Indoor has more third party app integrations than the Arlo Q.
Similarities between the Two
The two cameras really do share a lot in common. Here is a list of the most prominent components:
- Both cameras record in full 1080p high definition.
- The Arlo Q and Nest Cam Indoor both have a 130 degree angle field of view.
- Both rely on a mobile app for control and set up.
- Each camera is equipped with infrared LEDs for night vision.
- The Nest Cam and Arlo Q have motion detection and audio detection sensors.
- You will receive intelligent alerts from both camera models.
- Arlo Q and Nest Indoor are capable of two-way communications.
- You can live stream all day, every day, through each of the cameras.
- Both are compatible with Amazon Alexa through the Echo Show.
Side by Side Comparison Chart
Take a look at the handy chart to see each camera compared side by side
| Arlo Q | Nest Cam Indoor | |
| Resolution | 1080p HD | 1080p HD |
| Field of View | 130 Degrees | 130 Degrees |
| Mobile App | Yes | Yes |
| Night Vision | Yes | Yes |
| Motion Detection | Yes | Yes |
| Audio Detection | Yes | Yes |
| Intelligent Alerts | Yes | Yes |
| Two-Way Communications | Yes | Yes |
| Live Streaming | Yes | Yes |
| 3rd Party Integration | Yes | Yes |
| Cloud Storage | Yes | Yes |
| Installation Rating | DIY – Easy | DIY – Easy |
| Price | Check on Amazon | Check on Amazon |
Features and Options Details
I will discuss the prominent features and options of the Nest Cam Indoor and the Arlo Q to get a good look at what’s going on inside the cameras.
1. Installation and Set Up
Both Netgear (owners of the Arlo line) and Google (owner of the Nest line) make set up as simple as possible. For both cameras the set up is similar. I will cover both of them here. We will assume that you have the cameras unboxed, your cell phone at the ready and your wireless network on and broadcasting.
Setting Up the Arlo Q
The set up process should take you between five and 10 minutes. Arlo Q has a very simple DIY set up procedure:
- Using the USB cable, plug one end into the port on the camera and the other into the wall adapter.
- Plug the wall adapter into an outlet and wait for the LED on the camera to blink amber.
- Download and install the Arlo App and either create a new account or log into an existing one.
- Select “New System Start Up” (for new accounts, “Add Device” for existing ones) and select Arlo Q as the device to add.
- Follow the prompts on the app to connect to your wireless network.
- When prompted press the triangular sync button on the side of the camera until the LED blinks blue.
- Press continue on the app and you will see a QR code on the screen.
- Hold the QR code to the lens of the camera (about 8 inches away) until you hear a chime.
Once you hear the chime, set up is complete and the camera is ready to be placed in its location. You can use the base stand to set the camera on any flat surface. If you want to mount the camera on the wall, you may do so by using the included mounting bracket, wall anchors and screws.
Setting Up the Nest Cam Indoor
The process for the Nest Cam Indoor is very similar to that of the Arlo Q, but is actually even easier. The set up process should take about five minutes.
- Plug the power cord into the wall adapter and the wall adapter into the outlet.
- Download the Nest App on your mobile phone and create a new account (or create an existing one).
- Once logged in tap the plus (+) icon to add the Nest Cam to the system.
- The mobile app will take you through a few prompts to set up the device. Follow along.
- Once connected you will see the stream of the camera through the app.
Once set up is done you can move the device to its permanent location. It has a base stand for placing on a flat surface or you can use the included mounting bracket and screws to secure it the wall.
Bottom Line: The Nest Wins. The set up is faster with less steps for confusion.
2. Camera Lenses and Features
The cameras have a lot of features in common. What their lenses capture and how it is done are just some of the similarities.
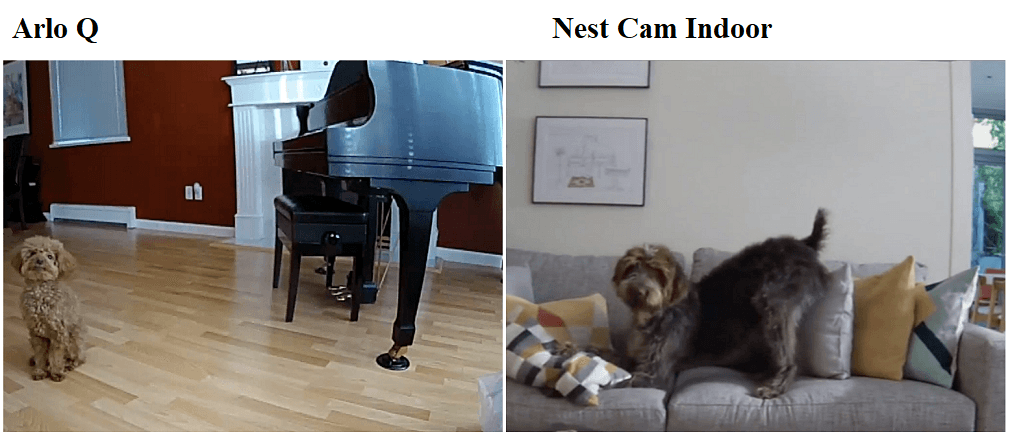
Both cameras record in full 1080p high definition. What people will fail to realize is that while 1080p is the optimal resolution at the moment (I foresee 4k being introduced soon) We still have to battle transferring the data over a wireless network and keeping the video small enough to store on a cloud. Compression comes into play a lot in these situations.
So while it is true you will record in 1080p, you may not always view in 1080p. When you are live streaming you will see the feed in all of it’s glory. However, once on the cloud and being reviewed, don’t expect the same level of clarity. You won’t lose a whole lot, but it will be noticeable.
Both cameras also use a wide-angle lens with a 130 degree field of view. This is a carry over from both company’s outdoor camera. I don’t like to knock wide angle lenses on security cameras, but sometimes there is too much. Most of the angles inside our home don’t need that much coverage.
If you are like most, you will find yourself wither zooming in, or setting up deactivated motion zones. You will most likely have a lot of blank wall space in your feeds.
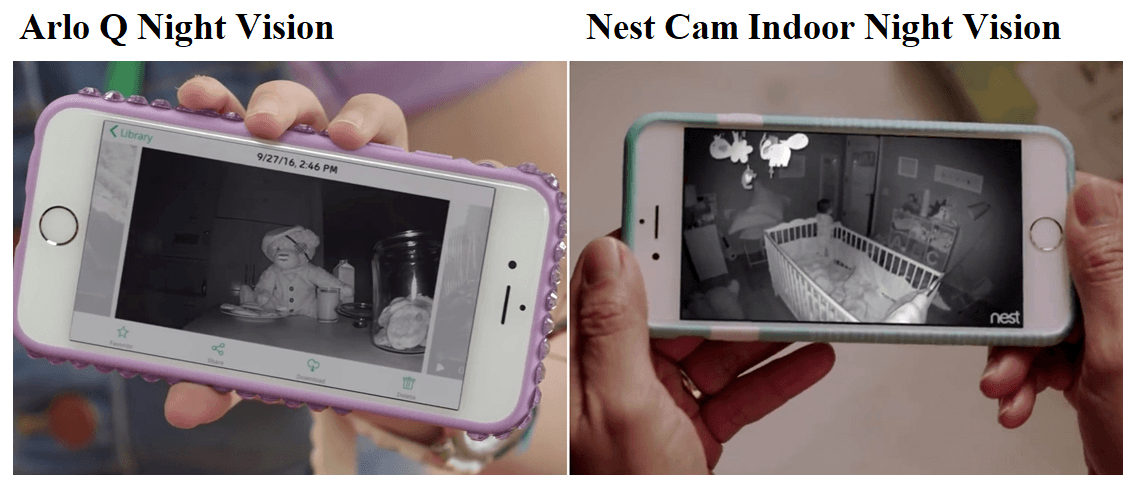
Each of the cameras also uses infrared LEDs with night vision mode. In night vision mode you will be able to detect movement in low-level lighting situations. The images of the Nest Cam Indoor tend to lose all color abilities, although I was able to once have full color in night mode with a lot of ambient lighting.
Arlo on the other hand was in full color more often than not. This is just a limit of the infrared and lens abilities, it happens to most all night vision mode cameras. You also need to note that when in night mode, you will lose distance on the motion detection. Each of the cameras will be effective to between 10 and 15 feet instead of the normal 20 to 25.
Bottom Line: This is a tie. Each camera is almost identical in the lens department.
3. Two-Way Communication
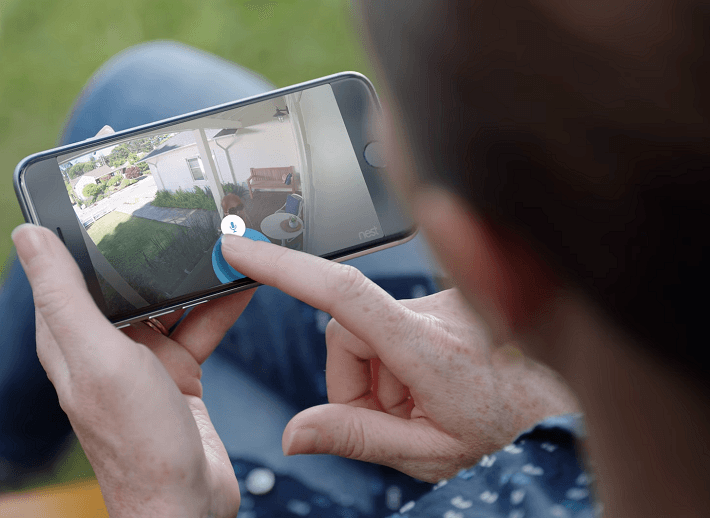
The Arlo Q and the Nest Indoor are also equipped with a speaker and microphone. The microphone is always on when the camera has power and will pick up audible alerts and send those alerts to your phone.
The microphone will also pick up voices of whoever is in range of the camera. When you get the alert you can use the mobile app to listen to the person talking.
With the speaker you can talk back. By using the mobile app, you will be able to use a push-to-talk feature that enables your voice to come out of the camera speaker and be heard by the person on the other end.
The two-way communications work over the wireless network and through your cell phone. This means you do not even need to be home to communicate. This comes in handy when deliveries are being dropped off or to scare off a would-be intruder.
What you should be aware of is that this is not a crystal clear communication. Your ability to hear will be determined mostly by the speaker or headset connected to your cell phone. On the other end, after your voice is moved through the wireless network, and through the speaker you will sound distant, sometimes as if you are in a cave or a tin can. In rare instances you may even drop out altogether.
Bottom Line: Another tie round. The cameras both have two-way communications.
4. Mobile App
To enjoy the features such as two-way communication, or to set up and use your cameras, you will need to download the Arlo app for the Arlo Q, or the Nest app for the Nest Cam Indoor. Each app is a free download and found in your devices app store, or by going to the Arlo or Nest websites.
With the mobile app you will be able to set up the cameras and link them to the system as we discussed above. You will also be able to use the push-to-talk feature for two-way communications, which we also talked about.
[easyazon_image align=”none” height=”1077″ identifier=”B017B2043W” locale=”US” src=”https://smartrobotichome.com/wp-content/uploads/2018/06/71DuRHFLVpL.jpg” tag=”srh-easyazon-20″ width=”1917″]What we haven’t mentioned yet is the ability to view the camera’s live stream. At any time you can open the app and pull up the camera and see, live, what the camera sees. There are many uses for this, and with the integration of third party apps you can even view the live feed on your television.
You will also be able to set up your alerts, name your cameras, manually enable or disable the cameras, enable geofencing, and create motion zones.
Geofencing is when you have the system linked to your GPS location. When you are home, or within the predetermined radius of you home, the system will shut down alerts. Likewise, when you leave the area the system will automatically enable alerts. This helps when you come home trying to get in the front door with an arm full of groceries, the system will not send you an alert of your own movements.
Motion zones can be set up as well. You will be able to use the apps to create specific zones in the field of view to either monitor or ignore. A monitored area will send alerts when movement is detected within that zone; an ignored zone will not send alerts, even if motion appears within that specified zone.
Bottom Line: Yet another tie round. Both apps have the same features and it is a personal judgment call to which one is easier to use.
5. Alerts
The Nest Cam Indoor and the Arlo Pro have intelligent alerts. What this means is, that instead of just getting an alert for movement, you will be notified of the type of movement.
For example, the intelligent alerts use stronger algorithms that can distinguish between a human approaching the camera and a dog or cat. The audio alerts can also tell the difference between a human voice and other sounds such as cars or dogs barking.
With these intelligent alerts you will notice fewer false alarms and less recording clippings since the cameras won’t be staying active to record a dog walking by.
Bottom Line: You guessed it, another tie. The alerts and detection algorithms are basically the same. It is impossible to say if one works better than the other.
6. Live Streaming
I touched on live streaming a little bit earlier. What this is, is a constant stream from your camera to your device or to the cloud. You can open your app or the website at any time and see what your camera sees without having to turn it on and wait for the image to appear.
This feature is active as soon as you set up the camera. However, to record the live stream you will need to purchase a plan from the respective company. Arlo has streaming plans as well as the standard cloud storage. However you will not be able to use one with the other. The streaming plans are $10 per month for 14 days of continuous live recordings (it overwrites twice a month) or $20 for 30 days (overwriting the first of the month, each month).
With the Arlo continuous plans you will be able to store, save and download recordings at any time.
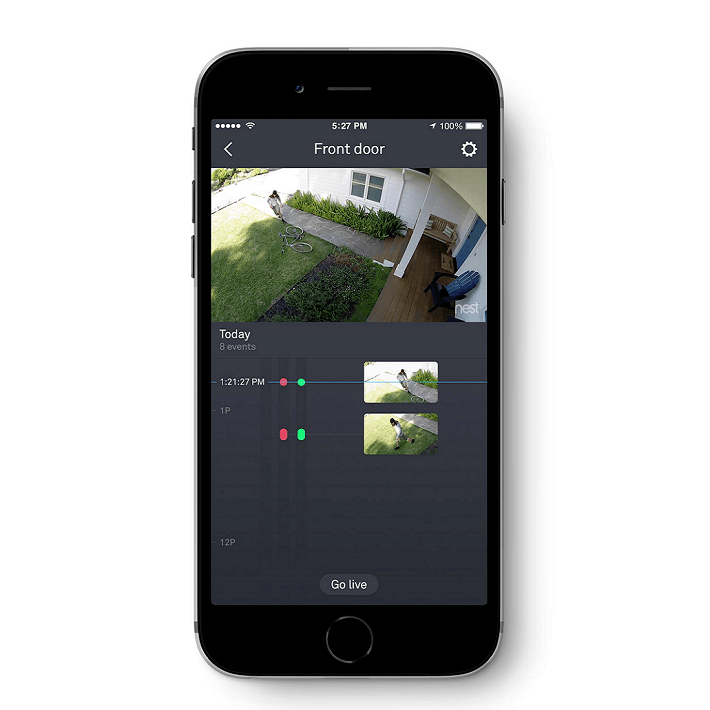
With Nest Cam you will have the ability to scroll back for three hours on the cloud. This is constantly being overwritten, but is free to use. The main problem with this, is that you will not be able to record, save or download from the live stream. You will be strong armed to purchase a Nest Aware account, which will include the continuous recordings based on the plan that you purchase.
Bottom Line: The Arlo Q wins. The storage isn’t made mandatory and you have the option to record live streaming or not.
7. Cloud Storage
Aside from the continuous recording storage, the Arlo Q has the option for free cloud storage for clips. You can store seven days free per month, meaning your videos recordings from alerts will be stored on the cloud at no cost to you. You can save, download or delete them as you wish. After the seventh day, it will begin overwriting the stored footage.
Arlo also has monthly plans to store more footage. You can get 10 days for $10 per month or $100 per year, or you can have 30 days for $30 per month or $300 per year. Your gigabyte limits will increase and your storage won’t overwrite until the 10th or 30th day.
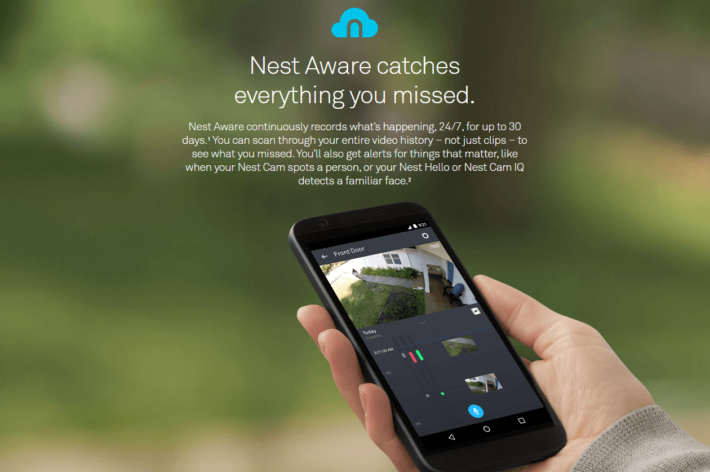
Nest also has a cloud service called Nest Aware. You will have to get Nest Aware if you want any recordings at all. Nest does not offer free cloud storage at all. Without Nest Aware you will use your camera in live stream only.
The Nest Aware, like the Arlo plan, has two options to choose from. You can opt for the 10 day plan which is $10 per month or $100 per year for the first camera and $5 per month or $50 per year for each additional camera. Or you can get 30 days for $30 per month or $300 per year for the first camera and $5/$50 for each additional one.
Bottom Line: Arlo Q wins. Free cloud storage, simple plans and inexpensive continuous recording storage.
8. Third Party Integrations
Both the Nest Indoor and the Arlo Q integrate with Amazon Alexa. You must use the Echo Show, Fire TV or Fire TV stick. This will enable you to use your voice to command Alexa to show your video feeds on the television.
Your options for control are pretty limited. You will be able to show or hide the feed with little other controls. For the Arlo Q, it ends there. There are currently no other third party integrations that work with it out of the box. There are reports that IFTTT can be made to work as well as SmartThings hubs, but it isn’t documented and doesn’t work without a lot of extra steps.
Nest on the other hand, has a few more integrations, including Google Assistant, IFTTT and SmartThings. You won’t get any additional features, though, but if you have these apps instead of an Echo Show or Fire TV, you can use them.
Bottom Line: The Nest Cam Indoor wins. More integrations is an easy choice.
Frequently Asked Questions and Answers
As promised, I will now answer the most common questions about the cameras.
Q, Can I connect these cameras directly to the modem instead of the WiFi router?
A. No. Neither camera has the capability to use the enternet port on the modem as there is no connection on the camera. They are wired cameras because they plug in to the wall, but they run on a wireless signal only.
There Arlo Q Plus, however, is the exact same camera as the Arlo Q, but it does offer a couple of upgrades, including an ethernet port for PoE connections.
Q. So, if I lose internet connection, will the cameras still work?
A. Technically the cameras work as long as they have power and are connected to the network. Which can be misleading. If your home network is still active and you lose internet connectivity, the cameras will still work, however, nothing will be seen on the live feed (it needs the internet connection to see the camera) and nothing will be recorded, saved or uploaded to the cloud.
So while the camera still technically works, it does absolutely nothing for you.
Q. Can you schedule recordings?
A. Yes! Sort of. Once you have cloud storage and continuous recording plans active, you will have the option to set times of the day for a week. The cameras will record to the cloud during this time. You can then go and review these times whenever you like, until the recordings are overwritten.
You can save them to prevent overwriting, or download to save the storage space from filling up.
Q. I am thinking of getting one to act as a baby monitor. Will these work?
A. Basically, yes. The Arlo Q has a better night mode than the Nest Cam, but both will work. You will have a bit of lag, as is expected, and the audio will work but can drop and cut out. But as far as functionality, it will work as a baby monitor.
Q. I run my wireless on the 5g channel, are these compatible?
A. Absolutely! Both cameras will function on both the 2.4 and 5g networks. As long as your upstream speed is at least 2mbs, you won’t have a problem connecting on either network channel.
Q. I still have a flip phone, and don’t want to get a smartphone. Can I use the app another way?
A. Of course you can! And welcome to the 1990s! You can log in to the respective websites and log in and create your account there. You will be able to do everything the app can do through the website.
Q. Can more than one phone have access to the feeds and controls?
A. You bet they can! You can download the app to any cell phone you like. With the Nest App each phone that has the app and is connected to the system will have full control of the cameras.
With the Arlo app you can set up separate accounts with different access levels. So, for instance, you can give your kid’s phones monitoring access without allowing them to change the settings.
You should be aware though, that if Geofencing is enabled all phones with the app must be in or out of the radius for it to function correctly. If one phone stays behind when you leave for the day, the cameras will not enable automatically.
Q. Are the cameras compatible with complex passwords?
A. Yes, of course! You can use any password that you use with your router, including special characters, 64-bit length passwords and PKA-2 personal or enterprise passwords.
What I Like About the Arlo Q
- Simple set up and ease of use.
- Free seven day cloud storage.
- 1080p resolution recordings.
- Continuous recording options.
- Intelligent alerts.
What I Like About the Nest Cam Indoor
- Five minute set up.
- Night vision mode.
- Third party integrations.
- Two-Way communications.
- Easy to use mobile app.
In Conclusion
Now it comes time to pick a winner. Unless you cheated and read my pick at the very beginning. The best option will obviously be the one that works best for you. However, knowing which one that is can be a difficult choice.
Each camera has a lot of features and options similar to the other. The both have high definition resolution and easy setup and installation. They both have two-way communications and intelligent alerts.
If you are looking for a camera that just works, and has continuous recordings; one that will look sharp mounted on the wall or sitting on a desk, and that has multiple third party integrations, then the Nest Cam Indoor might be your choice.
However, if you want all of that, plus affordable continuous recording storage and free cloud storage for normal clips and a slightly superior night vision mode, then the Arlo Q should be at the top of the list.
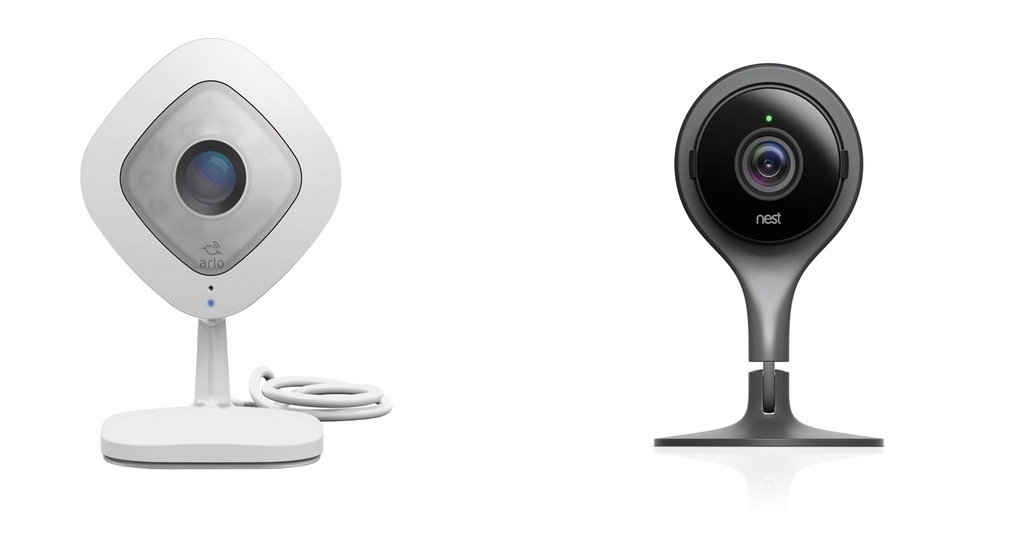
I chose the Arlo Q on the sole basis of the affordability of the cloud storage. With the Arlo Q you pay the same amount for up to 15 cameras. With the Nest Aware you will pay triple per year (or more) for just 4 cameras. In the end, the choice is yours, but security being near identical, its about saving money, too.
Relating to Arlo, the 24/7 live-streaming needs to be reset every 30mins. I bought the Arlo-Q so I could watch my waiting room from an iPad in my office while I was treating. This reconfiguration of pushing play, reconnecting then expanding it back to full screen every 30mins has had me drop it in the bin and get a Nest indoor camera
which actually does allow me to watch my waiting room all day. Arlo’s support team says there is no work around for the problem and they have it set that way to minimise data usage.
Nest Aware wins hands down for me! App is earlier, set up is easier and I love the person detection rather than being notified of everything on the Arlo Q like the lights from a car driving by or someone walking past your shopfront (so you end up turning off notifications all together).
Thank you for sharing your experience regarding the Arlo-Q not being able to live-stream 24/7, Susan. I’m sure other readers will find it very helpful!