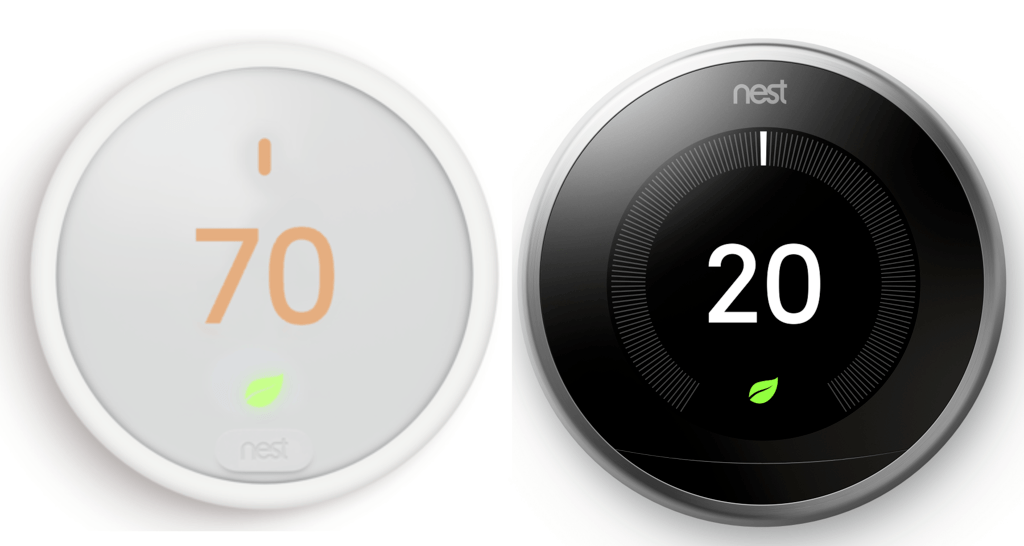
Nest learning thermostats have become more and more popular over the years. As Nest continues to make improvements in their designs and features, the products become more and more reliable. The Nest Third Generation is one of the latest versions of the original thermostat to be unveiled.
To gain a larger following and get the Nest thermostats into more homes, they also released the Nest E . This is an economical thermostat designed to be budget-friendly as well as easy to use. It has a lot of features the original Nest doesn’t even have and at a cost that most homes can afford.
Which one is best for you? A lot will depend on how you plan to use and set up the system with the thermostats. Some of it will be the budget. Let’s take a look at these two smart thermostats side by side to see who comes out on top. Hint: The winner is the Nest 3rd Gen.
Contents
Differences between Nest E and Nest Thermostat Generation 3
The differences in these two thermostats may be slight, but they are noticeable. Let’s see what they are.
- The Nest 3rd Gen has a large display with higher resolution than the Nest E.
- Nest E has a plastic shell that blends into the surroundings where the Nest 3rd Gen is the eye-catching black and silver metal of old.
- Nest 3rd Generation has Farsight that the Nest E lacks.
- The warranty for the Nest E is a year shorter than the 3rd Gen.
- The Nest E is a 6-wire system supporting fewer HVAC systems than the 10-wire Nest 3rd Generation.
- The Display on the 3rd Gen is crystal clear LCD while the E uses frosted glass.
- The price point difference between the two is about $75 with the Nest E being less expensive.
Similarities between the Two
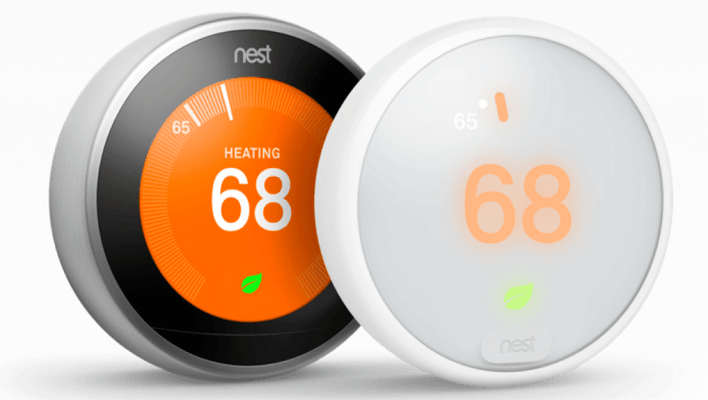
Everything else about the two units is identical. These similar features include the following.
- Each offers a DIY installation and set up that is fairly simple.
- Both units have wireless communications for the use of the mobile app, voice commands and limited third-party apps.
- Neither thermostat supports Apple HomeKit.
- Each version has and uses the iconic Nest Leaf.
- Your schedule and preferences will be learned over time with each thermostat.
- Nest Airwave is available on both devices.
- The Home and Away feature of Geofencing is used by each Nest thermostat.
Specifications Chart
Now I want to show you the two smart thermostats side by side so you can compare for yourself.
| Nest E | Nest 3rd Gen | |
| Dimensions | 3.19×3.19×1.14 inches | 3.3×3.3×1.2 inches |
| Weight | 1 pound | 1.2 pounds |
| DIY install | Yes | Yes |
| C-Wire required | No | No |
| Wireless Connectivity | Yes | Yes |
| Mobile App | Yes | Yes |
| Voice Commands | Yes | Yes |
| Amazon and Google Compatible | Yes | Yes |
| Apple HomeKit Compatible | No | No |
| Other 3rd Party Apps | Some | Limited |
| Touch Screen | No | No |
| HVAC Systems | 85 percent | 95 percent |
| Room Sensors | No | No |
| Learning System | Yes | Yes |
| Home and Away | Yes | Yes |
| Nest Leaf | Yes | Yes |
| Airwave | Yes | Yes |
| Farsight | No | Yes |
| Warranty | 1 year | 2 years |
| Price | Check on Amazon | Check on Amazon |
Features and Options
Now it’s that time when I take you under the faceplate and show you the important features in detail so you can make a better purchasing decision.
Installation Is Straightforward If Not Simple
It won’t take a rocket scientist or a degree in chemical engineering to install and set up either thermostat. Both have the same DIY instructions for each stage. I will briefly cover the process for you, here.
The first step is always removal of the old thermostat. Before disconnecting the wires from the old thermostat though, you should snap a picture with your cell phone, so you know which wires are connected where. You can also label them if that helps you better.
After the old thermostat is removed from the wall, you should mount the backing plate, pulling the wires through the middle. Once the backing plate is secured to the wall and positioned correctly, use the photo or labels to reconnect the wires in their appropriate spots.
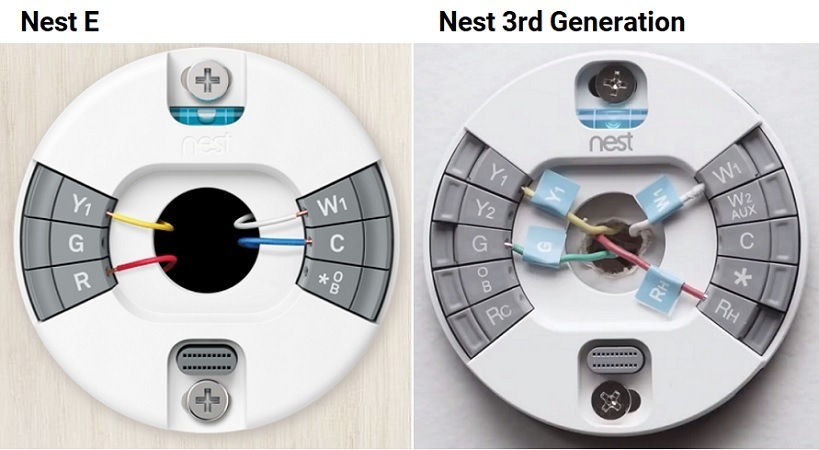
Note: The Nest 3rd Generation has ten wire slots where the Nest E only has 6. For most normal setups either one will work. However, if you have other HVAC systems such as humidifiers, dehumidifiers, ventilators or the like, you should check with the Nest website to ensure your system is compatible.
As of this writing, the Nest E is compatible with 85 percent of known systems where the Nest 3rd Gen is compatible with 95 percent.
Once the wires are in place, push the faceplate in position until it locks into place. There should be an audible click when it mounts.
From there, your installation is complete, and you can begin the setup procedure. You will need to download the Mobile app to complete the setup. The mobile app will take you through each step, and you will use the outer ring on the thermostat to select and manipulate settings such as entering your wireless network password and location preferences.
After your system is the setup, you can begin using it. For those with some experience in this process the entire install should take you about 20 to 30 minutes; 45 minutes to an hour if you have never done it before.
Bottom Line: This round is a tie. Even though the Nest 3rd Generation supports more systems, the install and set up is identical.
Farsight Works If You Have The Need For It.
One of the features that the 3rd Generation has is called Farsight. Each thermostat has a proximity and motion sensor that will note when you walk by and make the display light up, showing you the current temperature, time, weather and ambient temperature, you can choose which.
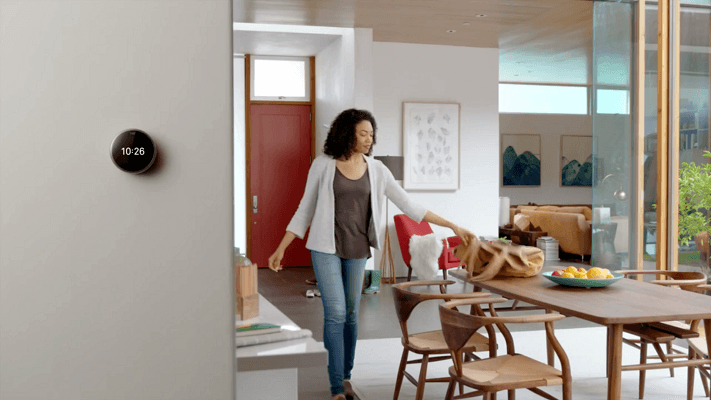
With the 3rd Generation, you can also enable or disable Farsight. Basically, Farsight is a feature that extends the sensors detection range to about 25 feet. So when you are down the hall, the thermostat will know you are there and light up.
With the 480×480 resolution LCD screen, you will be able to see the time or temperature from a great distance or have the sight from far away. Cute name, huh?
The Nest E doesn’t offer Farsight. The 320×320 frosted glass display isn’t able to be seen from great distances and has no use for Farsight because of it.
Bottom Line: The 3rd Gen wins. If you want not to have to walk all the way to your thermostat to see it’s read out, then Farsight is something to consider.
Home and Away is Geofencing to the Max.
Geofencing is basically an awareness, based on GPS, of where you (more specifically your cell phone) is physically located. Based on the GPS information, any device that has the Nest mobile app installed and connected will be monitored.
When all of the devices are outside a predetermined radius from the thermostat, then the system will go into energy saving mode, cutting off heating or air conditioning to save you money on energy costs.
When any of the devices re-enter the radius, the system will cut back on and get the home back to a comfortable temperature as you arrive in the door.
This is all good in theory, but mistakes can happen. If your radius is too large, you may never enter the energy saving mode. Likewise, if you leave in a hurry, late for work for example, and leave your mobile device at home, the system will think you are home too.
You can enable and disable this feature through the settings menu, but it does help cut down on energy consumption over time. Just note that if your radius is too small, you may make it in the front door before the proper temperature has been reached. Don’t get mad.
Bottom Line: This round is a tie. Both thermostats offer Home and Away functionality.
What is Airwave and Should You Care?
Nest explains their Airwave technology as a “Popsicle Principle” which basically states that when you remove a Popsicle from the freezer it stays cold for a while, and if you blow air past it the air stays cold, too.
Airwave is a technology that uses this basic principle. Just because the compressor isn’t running, doesn’t mean your air conditioning coils aren’t still cold. So when the humidity drops, the Nest thermostats will shut your compressor off early but keep the fan running.
By doing so, you can save your compressor running by up to 30 percent. Not only does this reduce energy consumption (that’s money) but it also prolongs the life of the compressor, so you won’t need to have it serviced (that’s a lot of money).
Since the coils stay cold and the fan doesn’t cost you as much to run as the compressor, Airwave is designed to save you money. Note, that it only works when the humidity in the home is low. Nest claims this will work for about 80 percent of their customers.
Bottom Line: This is yet another tie. If Airwave works for you, both thermostats have the ability to use it.
Room Sensors Are Now A Thing.
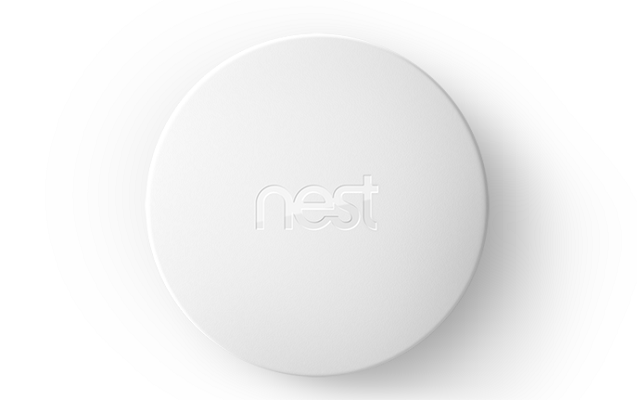
It may seem confusing as the chart above states that neither unit has Room Sensors. This is technically true, when you purchase your thermostat, don’t shake the box continuously looking for more pieces to fall out, room sensors aren’t included.
Room Sensors are a device introduced by Ecobee. Soon other companies such as Nest started following suit. Room sensors are exactly what they sound like. Little sensors that sit in a room and report to the thermostat several pieces of information:
- Is the room occupied or empty?
- What is the temperature in the room currently?
- What is the humidity level?
Based on these factors your thermostat is better able to control the overall condition of your home. Instead of relying on a single point of information gathering (the thermostat itself) you can get a more accurate temperature mapping by using room sensors.
Now that Nest also has them, you can purchase them from their website. They still don’t come with the thermostats themselves though. Maybe in the future, they will.
Bottom Line: Another tie. Both thermostats are compatible with the room sensors, but neither come with them.
How Do I Connect To Thee, Let Me Count The Ways.
There are several ways to connect to the smart thermostat. I will cover them quickly here.
[easyazon_image align=”center” height=”500″ identifier=”B0131RG6VK” locale=”US” src=”https://smartrobotichome.com/wp-content/uploads/2018/12/51pWeTQAQqL-1.jpg” tag=”srh-easyazon-20″ width=”500″]Obviously, you have local controls. Spinning and clicking the outer ring will allow you to enter the settings and programming of the thermostats. Both work the same way, though, with the displays, the Nest 3.0 may be easier to see this way.
Mobile app. You have it installed, or else you wouldn’t have been able to complete the setup. So, you might as well use it. Everything reported locally by your thermostat can also be accessed by the mobile app. You can enable and disable settings, view energy reports, and see the current temperature and status of the system.
Voice controls, though, now that’s where the technology is. Having a smart home means having more control and being able to tell Alexa or Cortana to raise your temperature or turn on the fan.
If the device stats “works with Nest” then integration is seamless. Both thermostats have out of the box integration with a lot of third-party apps. These include Amazon Alexa devices, Google Home, IFTTT, Wink… you get the idea.
One thing to note for you Samsung SmartThings users; the Nest 3.0 model will not (as of yet) integrate with SmartThings Hubs.
Also, for you Apple fans out there, there currently isn’t a way to have either the E or the 3.0 model connect with Apple HomeKit. Sorry.
You may find other apps that work to have some controls over your thermostat by making recipes through IFTTT, but you attempt this at your own risk.
Bottom Line: Nest E wins this round. Since it does support SmartThings and the Nest 3rd Gen doesn’t, it’s a slight win, but a win nonetheless.
Frequently Asked Questions
Allow me to answer some of the most commonly asked questions. If you still have a question, please feel free to ask in the comments section below.
Q. Do I really not need a C-Wire?
A. You really don’t. Some systems though may find the use of a C-wire critical or beneficial. The thermostat gets its power from a rechargeable lithium-ion battery, so it doesn’t rely on house power.
However, C-wire connections are more stable and you can have one professionally installed and used, if you decide you need it.
Q. You said even an idiot could install this, but I can’t, what can I do?
A. Please. I would never call you an idiot to your face. If you ever have any trouble installing the device, here is what you do: Remove the faceplate, take a picture of the mounted backplate and wires poking out through the middle.
Then, you send that picture to Nest customer service. They will look at your picture and email you back with step by step instructions based on your image. Pretty cool, huh?
Q. I pulled my old thermostat off the wall and there is a giant hole and missing paint. What can I do?
A. Run. Burn the house down and run. Just kidding. You can use one of the Nest wall plates to cover the hole and unsightly paint job (or 60’s motif wallpaper) and mount the thermostat to that.
Alternatively, you can patch the hole and repaint to match the rest of the hallway or room the thermostat is in. This will probably look the best but take the most amount of work.
What I Like About the Nest E
- Slightly smaller in size and it blends into the wall, not demanding attention.
- All the features you need and a few you want.
- Set up is easy and fairly intuitive.
What I Like About the Nest 3.0
- High-quality design and attention-grabbing details.
- Farsight makes seeing your temp or time easier.
- Bright, high-resolution LCD is easy to use and control locally.
In Conclusion
When choosing a Nest thermostat, it all comes down to what you currently have, what you want and what your budget will allow. Installation and use is near identical here and other than the looks, once it is all set up and active, you won’t notice many differences between the two.
If you need to see your display and want friends and neighbors to comment on your beautiful thermostat, choose the Nest 3rd Generation. It costs a little more, but you won’t be disappointed.
Likewise, if you want your thermostat to blend into the background and not be so noticeable, and you don’t need to see a display stating the temperature from 40 feet away, choose the Nest E. You will save money and except for a few HVAC system setups, you will be able to connect to almost anything.
Check here to see all the smart thermostat deals on Amazon today.
