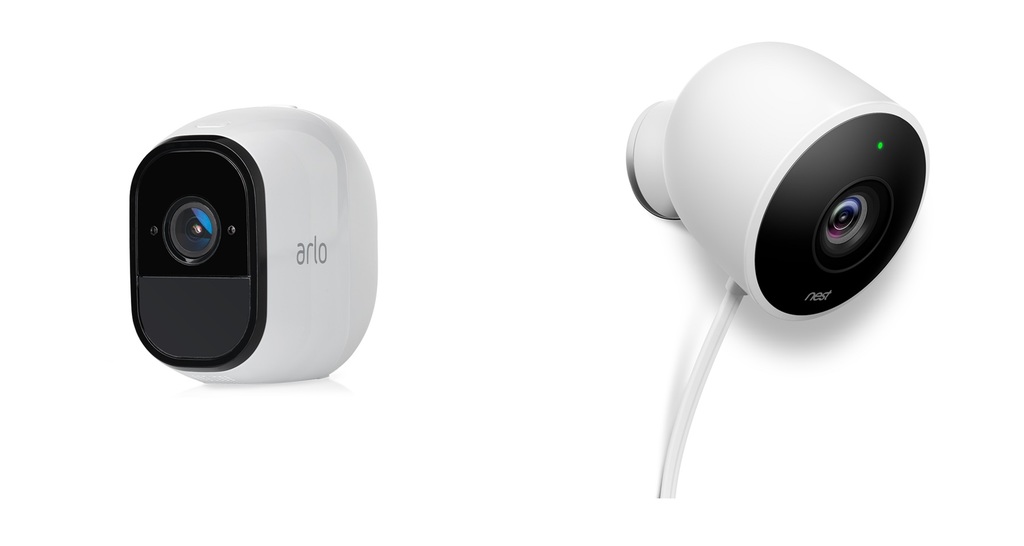
When you are looking for outdoor security cameras, you want the very best. That’s why you come read my articles. Today, I will compare the Arlo Pro from Netgear and the Nest Cam Outdoor from Google.
This article will cover, in depth, the two cameras and their features, what they have in common and where they differ. I will also show you side by side comparisons of the two models and answer your most common questions. Further, I will tell you what I like about each one and give you a quick rundown of both cameras.
To get the complete picture (pun intended) continue reading the entire article below. However, if you know to trust my opinion and just want to know which one is the best: The Arlo Pro wins in the end. (Spoiler alert!)
Contents
The Differences
Both of the outdoor cameras do the same thing in the end. The different ways they get there though, may be important to you.
- Nest Outdoor is a wired camera only. Arlo Pro is a wireless (battery) camera.
- Arlo Pro has free (and subscription) cloud storage; Nest Outdoor storage is pay only.
- Nest Outdoor records in full 1080p; Arlo Pro records in 720p.
- Nest Outdoor records non-stop; Arlo Pro records only when motion is detected.
- Arlo Pro offers you the ability to review all saved clips; Nest has Sightline allowing you to review the last three hours.
- The Arlo Pro Base Station has a 100db siren for alerts; The Nest Outdoor does not have a siren.
- The operating temperature for the Arlo Pro is larger than the Nest Outdoor.
- Arlo Pro has night vision and will record in low light situations; Nest will record at night, but only what can be seen with light.
The Similarities
If you need a specific feature, knowing that both models offer it may help you make your choice.
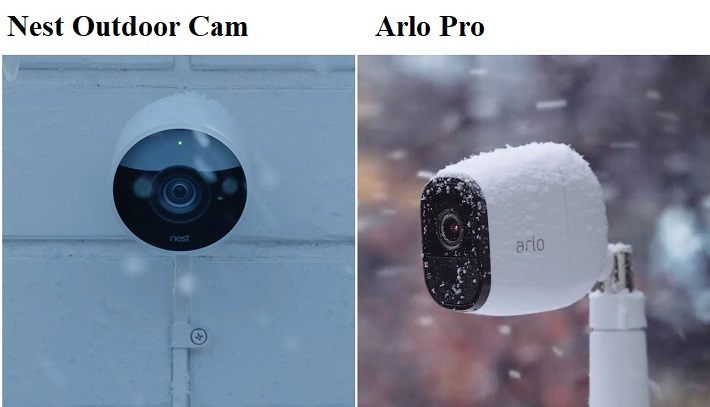
- Both Cameras are weatherproof and suitable for continuous outdoor installation.
- The viewing angle for each camera is 130 degrees.
- Each of the cameras come with a speaker and microphone for two-way communications.
- The Arlo Pro and Nest Cam Outdoor offer DIY installation.
- Each of the models has a mobile app for further control and settings.
- The Nest Cam and Arlo Pro both offer alerts when movement is detected.
- You can easily integrate both models with Amazon Alexa for voice control activation.
- The cameras require a wireless home network to connect.
Side By Side Comparison Chart
Take a look at each of the model’s side by side:
| Arlo Pro | Nest Cam Outdoor | |
| Power | Rechargeable Lithium-ion Battery | Hardwired Plug |
| Weatherproof | Yes | Yes |
| Night Vision | Yes | No |
| Resolution | 720p | 1080p |
| 24/7 Recording | No | Yes |
| Mobile App | Yes | Yes |
| Voice Control | Amazon Alexa | Amazon Alexa |
| Alerts/Reports | Yes | Yes |
| Siren | Yes | Yes |
| Installation & Set Up | DIY | DIY |
| Cloud Storage | 7 Day Free | 30 Day Free Trial |
| Zones | Motion | Motion |
| 2-Way Communication | Yes | Yes |
| Operating Temperature Range | -4 to 113 deg (F) | -4 to 104 def (F) |
| Price | Check on Amazon | Check on Amazon |
Arlo Pro Mini-Review
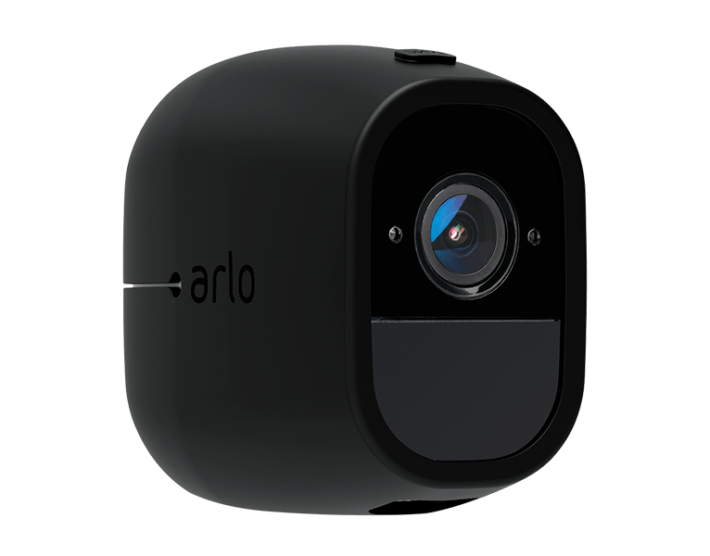
The Arlo Pro is a sleek and stylish camera. At first glance, the egg-shaped white camera looks like something out of a movie and may not be something you want to draw attention to. However, after installing the camera, everyone notices it, and I believe this is a good thing. If friends and family notice the camera, then so do would-be bad guys.
Installation is so simple I didn’t even have to read the instructions (although I recommend you do, always. I am just one of “those” guys). Downloading the mobile app and following along made set up a breeze and I had no issues with connectivity. I will say that there are reports of connectivity issues during set up and install, though.
Most likely this is due to the WiFi capabilities of the reporter’s network, but I wasn’t there and don’t know. Using the camera is also intuitive. You can set up motion zones, adjust the sensitivity of the motion detectors (three levels) and after playing around for a couple of days I have virtually zero false alerts.
False alerts take up battery life, recording space and my time, having to check my phone, switch to live view and see nothing there. Of course, there is the mental aspect as well and thinking that I just missed seeing the bad guy and now I am in the backyard in a robe and carrying a baseball bat. It’s not a good thing.
Once the settings are made and the installation is done, everything runs very smooth with the Arlo Pro. I was surprised at how efficient everything is and despite numerous reviews saying the resolution and night modes were horrible, I can tell you differently.
Infrared night vision still requires light, just not a lot. You can add night vision lights that produce infrared light for the cameras to use, or just have a well-positioned exterior light. The image quality was very nice and I never had to guess who was at my door because of the resolution.
I am generally not one to give star ratings but I will this time. The Arlo Pro, all things considered, gets 4.5 out of 5 stars from me. That half a star deduction is because there is not an outdoor mount included, which, for an outdoor camera, I think there should be.
Nest Cam Outdoor Mini-Review
The Nest Cam Outdoor is one of the few cameras that can easily rival Arlo. It offers two-way communication and records not only in full 1080p HD but also continuously. You can’t disable that though. My biggest problem was with the wireless network being taken over by the camera.
With the camera and my cell phone on the wireless network, everything was fine. As soon as I turned on my computer though, everything slowed to a crawl.
The image quality is great and even at night, I could see well enough to tell who was who. I did have an external light giving ample illumination for the camera though. When I turned the light off, the camera went all but dark.
The cloud service is amazing. I have yet to see one better. The controls and options and features were astounding, but so was the price. I did have the option to not use the cloud service, but I lost all recording ability, save for Sightline.
I used Sightline to review a couple of hours back and it was less than impressive. It wasn’t as close to DVR style as it is made out to be and instead of actual footage it was more like a series of still photos. Almost like flipping through a photo album really fast.
I did find the installation fairly simple, but it took me a long time to get a good position that was not only in the range of the wireless but also in the range of an outlet. Even with 25 feet of power cord I still had to use an extension.
The mobile app looked promising, but it was quite clumsy to use. While the menus were clear and the functions all there, it wasn’t very intuitive or user-friendly until I had messed around with it for about four days.
As with the Arlo, I will give a star rating here too. For the Nest Cam, I offer 3.75 out of 5 stars. I remove half a star because like the Arlo there is no external secure mounting option included. I took off another half of a star because I was all but strong-armed into paying for the cloud service. I removed a quarter star because while the constant recording is nice, I would like the ability not to have that when not needed and get my bandwidth back.
Dimensions and Features
Let’s take a detailed look at the features, options and dimensions of the two cameras to get a better idea of what’s going on behind the lens.
1. Installation
Before we go any further, I want to tell you exactly how these cameras are installed. To keep the installation as easy as possible, we will be using the most basic set up and camera mount possible. This means for the Nest Cam and the Arlo Pro I will describe the magnetic mount option.
Arlo Pro:
The first thing you will always do is remove everything from the packaging and set it out so you can see everything. Take a minute to read the instruction manual thoroughly and then we will get started. The installation process should take you between 10 and 20 minutes.
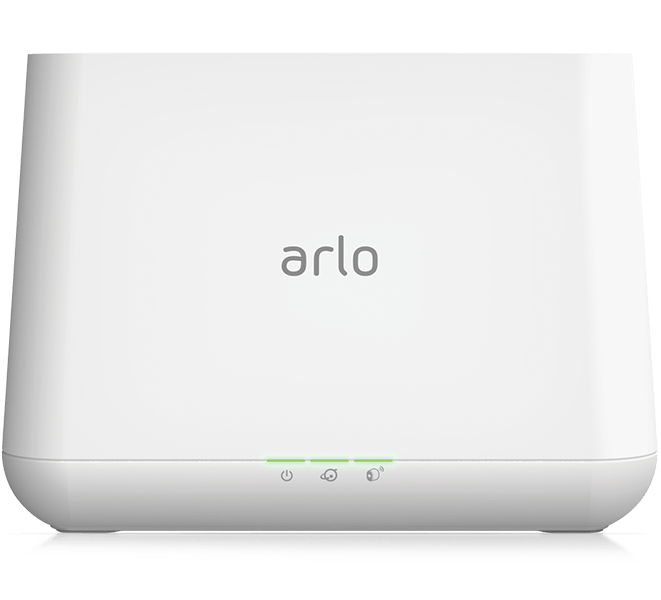
- First, connect the Base Station to your router using the ethernet cable (yellow) provided.
- Connect the power adapter to the Base Station and plug into the wall outlet.
- Turn the Base Station on.
- Download the Arlo App on your mobile phone and open it.
- Insert the batteries into your Arlo Pro camera.
- Log into the Arlo App and click “New System Set Up.”
- Choose the Arlo Base Station option. The app will find your base station automatically.
- Press the Sync button on the side of the Base Station. A green Led will begin to flash.
- Press the Sync button on the top of the camera and a blue LED will begin to flash.
- Once the camera is synced, the blue LDE will flash rapidly.
- Using the included screws (and drywall anchors if needed) secure the magnetic holder to the mounting surface.
- Once secure, place and position the camera to the magnetic base.
- You will need to repeat the Sync steps for each camera individually. It is advised to sync the cameras when they are within 3 feet of the Base Station and before mounting.
Nest Cam Outdoor
Since the cameras for the Nest system are not wireless, there will be extra steps for getting them up and going. Also, because there is no base station you will be using the mobile app more. The average installation time for the Nest Cam Outdoor is about 30 minutes.
As with the Arlo Pro, remove everything from the packaging and set out within easy reach. I will assume you already have your mounting location picked out and that it is close enough to an outlet to power the camera.
- Plug the USB power connector into the camera (twist and push to lock in place).
- Plug the power connector into the wall outlet. A blue LED will come on when the camera has power.
- Download the Nest App and log in/create an account.
- Once signed in, press the plus sign (+) to add the Nest Cam.
- Follow the app prompts and instructions to connect the camera to the app and network.
- Take the Nest Cam outside and plug into an external outlet.
- Note: You also have the option to drill through to the interior and power the camera from inside.
- Once powered the Nest Cam will connect automatically to the network. The LED will turn green when it is connected.
- Place the camera in the spot you have selected for mounting to ensure the network connection stays.
- Verify connectivity and streaming through the mobile app.
- Use the included hardware to mount the magnet bracket to the wall.
- Attach the magnet to the bracket and the camera to the magnet.
- Adjust the camera as needed to cover the area.
- Rout the power cable as needed using the included clips and screws to keep the power cord out of sight and reach.
- The power adapter should be mounted at least 18 inches above the ground.
- Use the included hardware to mount the power adapter bracket to the wall.
- Snap the adapter to the bracket and continue running and securing the power cable.
Bottom Line: The Arlo Pro wins. Installation for both is very DIY, the Arlo Pro is much more simplified, though.
2. Mobile Apps
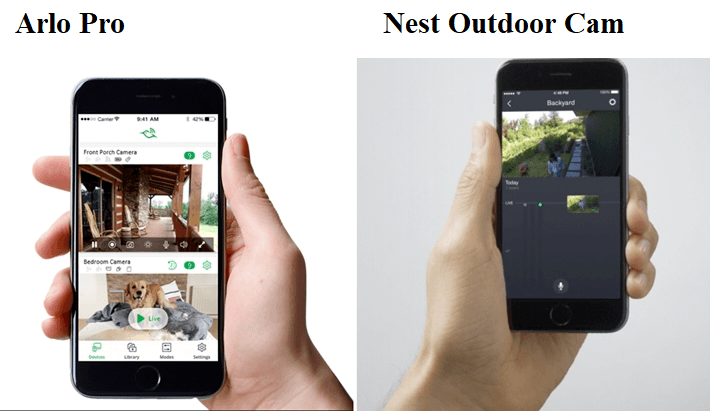
The Nest App and the Arlo App have the same basic functionality. You will need them to set up the cameras and system as well as other features they include.
Since both systems offer two-way communication, you will use the app to see, hear and talk to whoever is in range of the camera. Don’t expect crystal clear quality from either one though. These systems run through the wireless network of your home and will lose a bit during the transfer.
You won’t come out sounding like Darth Vadar (too bad) but you will be understood and able to hear clearly.
You will also use the apps to view the live feed of the cameras. With the Nest app, this is always on since the cameras record constantly. However, with the Arlo Pro, you will be able to turn on live view and enable the camera without a triggered event.
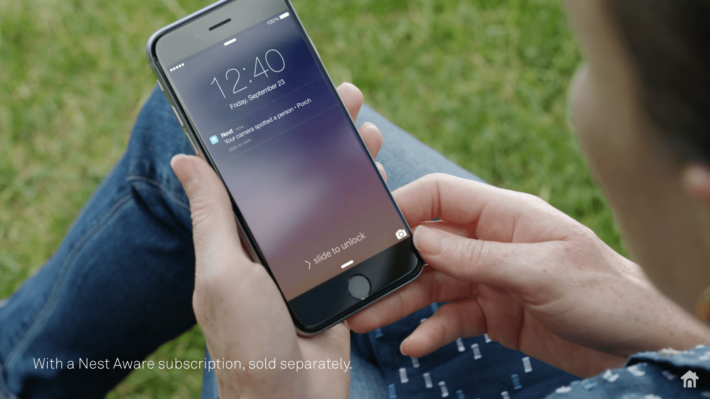
When events are triggered, each camera will alert you via the mobile app that motion was detected. You can then take action as needed.
The mobile apps are also used to set up motion zones, sensitivity, manual record (Arlo Pro) and communications. Since these cameras run on the WiFi network, you can use the app from anywhere. Even able to talk to the delivery guy dropping off your packages while you sit at your desk, working across town.
Bottom Line: This is a tie. Both rely on the mobile apps and they both have the same functionality.
3. Recording and Storage
This is where things tend to get a bit tricky. I will start with the Arlo Pro. The Arlo does not offer continuous recordings. By default, it is set to record for five seconds whenever motion is detected. These five-second clips are then saved on the Arlo cloud server for you to review, save or delete.
You have the ability to adjust the recording duration. With the latest software push Arlo recently sent out, you can record up to five minutes as long as there is motion. To understand this, it will not detect motion and record for five minutes. It will detect motion and begin recording. If the motion stops, so will the recording. If the motion continues, however, it will record for up to five minutes.
The clip is sent to the Base Station to the Arlo Cloud where it will remain until reviewed, deleted or overwritten. Arlo will give you free of charge a rotating seven days worth of cloud storage. This is for up to five cameras. If you have more cameras (up to 15 supported by the Base Station), you will need to purchase a monthly or annual plan.
The free storage is a rotating storage. This means that when a clip is sent, it is stored for seven days. On the seventh day, it will be overwritten by the next recording. You can log in to the account, review and download a clip to save as needed. However, there is no automatic saving and no local storage.
In the event of a power outage or network failure, Arlo Pro provides a USB dongle for the Base Station that will store the recordings until power and network are restored. The clips will then be uploaded as normal. No, you cannot record directly to a USB device or hard drive.
The Nest Cam Outdoor also has cloud storage and recording. However, theirs works a lot different. The Nest records continuously, 24 hours a day. All recording streams are uploaded to the Nest cloud and you can review the entire footage at any time. However, this is provided that you purchase a monthly plan.
If you do not purchase a plan (you will receive 30 days for free when you first make your purchase as a trial), you will lose the cloud storage ability. Your Nest Cam will then act like a DVR for your cable TV. This feature is called Sightline. You will have a three-hour window that will constantly be overwritten.
If you do nothing the first minute of the fourth hour will overwrite the first minute of the first hour and the cycle will continue like that. At any time, you can go back up to three hours and back to live.
In this manner Nest almost forces your hand to purchase the cloud service package. It can become very expensive very fast. Each camera you have will cost even more. That being said, the controls, storage and review of the cloud service are better than any other I have seen, including Arlo’s.
Bottom Line: Arlo Pro wins. Even without constant recording, the ability to have free cloud storage is important.
4. Power
The cameras need power. Without a power source, they just won’t work. I know, I am just as surprised as you are.
The Nest Cam only has one power option: wired. You must plug the camera into an outlet. You also have twenty-five feet of power cord: 10 foot from the USB end that plugs into the camera and 15 feet from the power adapter to the outlet. You cannot get a smaller cord, so if you only need none feet total, you will have 16 feet to bundle up and hide somehow.
Arlo Pro, on the other hand, is completely wireless. The cameras run on rechargeable lithium-ion batteries (four of them). Arlo states that the batteries will maintain a charge for up to six months. However, this isn’t very accurate. Unless you only get two or three motion alerts per day, you can expect more like three months of charge.
The good news is that the batteries don’t take long to recharge at all and can be done during one of your free afternoons while you are home.
Also, if you are so inclined, Arlo offers a solar panel power adapter. This is a separate purchase and not included in any Arlo Pro kit. However, if you do get it, you won’t need to recharge or exchange batteries anymore. The solar kit attaches to the camera and keeps constant power to it at all times.
Bottom Line: Arlo Pro wins. There is no need to run wires and you have multiple power options.
5. Two-Way Communications
Seeing who is at your front door (or jumping your fence gate) is the major purpose of the security cameras. The ability to hear them is an added bonus, and the ability to speak to them without ever leaving your recliner is a huge bonus.

Both the Nest Cam and Arlo Pro have a built-in speaker and microphone so that you can see, hear and talk to anyone that is in range. You will use the mobile apps for communication, once the event is triggered you can activate the speaker and microphone to communicate.
Because you run the mobile app and the cameras over a wireless network, you don’t even need to be home for this. There is an obvious delay, depending on connectivity and network speeds, and the voices (both sides) will sound a bit different.
However, you will be heard (and hear) clear enough to understand without having to repeat yourself constantly.
Bottom Line: This is a tie. Both cameras offer two-way communication.
6. Alerts
Whenever a motion event or zone event is triggered, you will get an alert from the camera through the mobile app. How the cameras react is quite different though.
The Nest Cam Outdoor will do… nothing. It will sense the motion, trigger the event and then continue its recording. Because it records continuously, there is nothing more for it to do. You can activate the communications if you wish, but you do this manually.
The Arlo Pro is in sleep mode (of sorts) and once motion or zone events are detected, the camera will come to full status and begin recording. It will then send you an alert and continue recording based on the settings you have made (duration, constant motion, etc.). Like the Nest Cam, you can manually activate communications if you wish.
Because of the sleep mode functionality, some owners have reported a slight delay in the recording. They state that someone can approach the door, ring the doorbell and wait (up to 5 seconds) before the camera actually starts recording or sends the alert.
As a personal aside, I haven’t noticed a lag in the recording, however, with the numerous reports I am not calling anyone a liar.
Bottom Line: Nest Cam Outdoor wins. It is already recording so you won’t miss anything.
Frequently Asked Questions
I will answer the most common questions regarding these two cameras that seem to crop up whenever I deal with home security installations.
Q. What are the mounting options for the cameras?
A. The Arlo Pro has magnetic spheres that mount to the wall and then the camera’s metal backend attaches to the magnet. They also have two other mounting options available as a separate purchase. You can get an indoor wall or ceiling mount that is also magnetic and they offer an outdoor security mount that attaches to the surface with screws and then the camera screws into the mount.
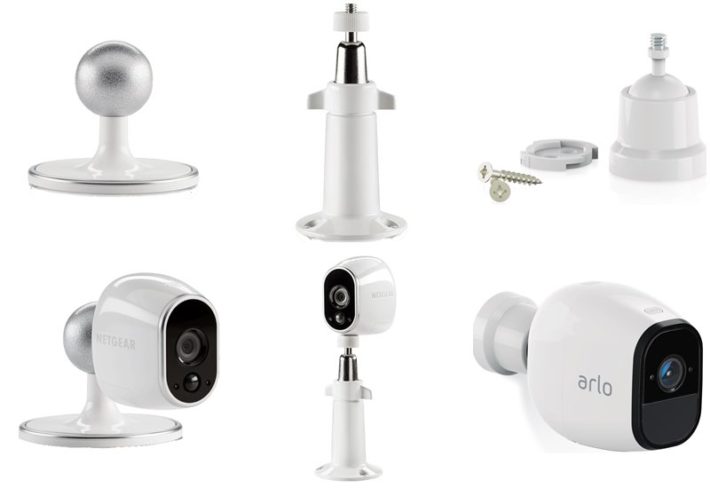
If you are mounting the outdoor cameras outside (logical, I know) I highly suggest purchasing the outdoor security mounts. Nothing will keep your cameras from being ripped off the mount, but the outdoor mount will take a little while longer.
The Nest Cam also has a magnetic mount suitable for indoor or outdoor use. Because the cable secures to the wall and there is a twist lock on the USB to camera end, there is no other mounting method provided by Nest.
However, there are third-party vendors that make and sell stick mounts, bendable mounts and secure wall mounts for the Nest Cam Outdoor.
Q. Do I really have to pay for cloud storage?
A. No. You do not have to pay for cloud storage. If you are using the Arlo Pro and have less than five cameras, a rolling seven-day storage is included. If, however, you have more than five cameras you will need to purchase a monthly or annual plan. They have two plans one costing $3 per month or $30 per year, or the monitored storage for $10 per month or $100 per year.
Nest Cam doesn’t require cloud storage at all, but you will lose the ability to record 24 hours a day. Instead, you will switch to Sightline and record for 3 hours at a time, each being overwritten by the last.
If you do decide to purchase their cloud storage (they call it Nest Aware), you will have full access to all recordings basically forever (not really but might as well be). The cost for this service depends on the number of cameras you have.
Nest Aware also has two plans. You can choose the 10-day or 30-day recording times (this is how long until overwritten). The ten day costs you about $10 for the first camera and $6 per each additional camera where the 30-day will cost $30 for the first camera and $15 for each additional camera.
If you have three cameras, and you want a year plan, the Arlo Pro will cost you $100. The Nest Aware will cost you $600. (there is a discount for paying for 12 months instead of monthly)
Q. How does this work with Amazon Alexa?
A. Each camera will have the ability for voice control using Amazon Alexa after you install it as a skill. You will need to use an Alexa enabled video device, such as the Amazon Echo Show or FireTV Stick. It will not work with Echo or Dot.
The Arlo Pro will be able to take such commands as “Alexa show me the front door camera” or “Alexa, stop.” You can even get the skill straight from Amazon and install it with your voice.
The Nest also has the same features as the Arlo Pro and can be used to view the live stream of the camera you select.
Q. Does the Nest Cam Outdoor have a special unit to connect to the WiFi network?
A. No. Unlike the Arlo Pro that uses the Base Station, the Nest Cameras connects directly to your home WiFI router. You will not need any special equipment as long as the camera is within range of your wireless router.
If it is not, you may need to purchase a wireless network extender, but this is a third party peripheral and has nothing to do with Nest or Arlo on their own.
Q. Will this take up my home network bandwidth?
A. Absolutely. Both the Arlo and the Nest will consume bandwidth while utilizing the recording feature. As you can probably tell, the Nest will consume more bandwidth due to its constant 24/7 recording.
Q. Can I mount these upside down and flip the image, I want the cord to come out of the top?
A. Yes. Actually, you can install the Nest upside down, so the cord comes out of the top of the unit instead of the bottom. If you use this mounting option, you will then need to access the camera settings in the mobile app and enable the 180-degree flip to change the viewing angle of the lens.
Q. What happens if I lose power, will I lose camera coverage?
A. The short answer is no, not really. Because the Arlo Pro is completely wireless, you will still have camera functionality. It will still come on when motion is detected and record. However, without power, the network will also most likely be down, and the recordings will have nowhere to go. All the settings and functionality will be saved and restored when power is returned though.
For the Nest, you won’t lose any settings as there is a lithium-ion battery back up. However, this battery is designed to store the settings and features you have enabled and not run the camera. It wouldn’t do any good anyway as all feeds are sent to the wireless network, which, as we said, will also be down until power is restored.
What I like About The Nest Cam Outdoor
- Powered option means I don’t have to worry about batteries, ever.
- The sleek design appears to be a high-end spot light and not a camera.
- Continuous recordings.
- Sightline allows for three-hour reviews of the live stream.
- Two-way communications.
What I Like About The Arlo Pro
- 100 percent wireless.
- Installation takes less than 10 minutes.
- Free seven-day rolling cloud storage (up to five cameras).
- Two-Way communications.
- Optional solar power option.
That’s A Wrap
Home security is a serious thing and you need the right security cameras to feel safe in your own home. Nest by Google and Arlo by Netgear offer top of the line models that will suit just about anyone’s needs.
If you want a fully functional camera that is weatherproof, hardwired and offers continuous recording, then the Nest Cam Outdoor might be your option. You will pay less for the system, but you will end up paying more for the cloud storage and service. I will say that the cloud service and functionality are better with the Nest, but not enough to justify the cost, unless you only have one camera.
On the other hand, if you like free cloud storage, wireless cameras that are arguably the easiest to set up and install, the Arlo Pro might just be your choice. Arlo has set the bar in home security cameras since their initial release and continue to improve with each new version.
In my opinion, the Arlo Pro is just a better option, even with the lower resolution and lack of constant recording. It is a better deal in the long run, financially and the cameras work just a little bit better.
Click here to see all the security camera deals on Amazon today.
Hi and thanks for the review,
Is the Arlo Pro system you reviewed 720 or 1080?
Thank you
Steve
Hi Steve,
The Arlo Pro covered in this article has a resolution of 720p. (The Arlo Pro 2’s resolution is 1080p.)
Hope that helps!