
It is no surprise that robotic vacuums are already helping hundreds of thousands of homes around the world. Your home might be next! However, a robotic vacuum is a substantial investment, with some modern models tipping the scales at over $1100.
Before you plop down that kind of cash, we have put this article together. Here you will get tips and tricks to help you pick the right robot vacuum for your home. We will also help you prepare your home before the robot arrives and show you how to care for the robot once you have it.
Contents
How to Get the Most From This Guide
There are four primary stages, or phases, you will go through during the course of ownership of a robot vacuum. There are five stages, but we won’t cover the “convincing your wife she needs a robot because your floors aren’t clean enough” stage. Sorry, you’re on your own there.
The first stage is the “Research Phase.” Here you will benefit from reading about as many different types of robots, features, and options that there are, trying to decide which one you want the most. This article will outline things you need to do besides scouring Amazon reviews and looking at videos of cats riding Roombas.
Next, you move on to the “Purchase Phase.” This is when you actually sit down and click that Buy Now button on the model you decided on. Here, we will offer you some tips to help save money and other purchases to consider before you empty your cart.
From there, you quickly move on to the “After-Purchase Phase.” Now your Roomba has arrived, and you have a giant box sitting on your living room floor! What do you do now? We will show you the proper ways to set your robot up and how to get the most out of it over the coming weeks.
Finally, there is the “Long-Term Care Phase.” Proper maintenance and care of your iRobot Roomba are critical for your happiness and the longevity of the machine. You spent all that money on the robot; you need to take care of it. Oh, and your wife is tired of reminding you, so after you finish reading this article, go wash the car.
Research Phase
Here we are, learning everything we can about these beastly little robots. Some have voices; others beep at you. You can have mobile apps or use voice commands. Perhaps it only has a single button. The point is, you have a lot of choices when it comes to the features of these vacuums.
Before you decided on the biggest, baddest, most advanced model around (it’s the Roomba s9, by the way), you need to stop and think if you actually need the “turbo-jet diffused exhaust port.”*
Marketing ads are good at selling you on the features and advancements of the newest, most expensive models. Not just with Roomba robots, but across the industry. When you are comparing models, you need to stop a moment and look at the differences between the models. From that list, you can decide if the extra cost for a feature is worth it or not.
*Note: turbo-jet diffused exhaust isn’t a real thing.
Get the tips
Here are some tips to help narrow your final decision down.
Make a note of your flooring type. Is your home all hardwood flooring? If so, you can eliminate the models that focus on only cleaning carpets. You don’t need a model with the rubber paddle extractors like the Roomba i7 when a brush roller accomplishes the same thing.
The same is true for homes with wall-to-wall carpeting. The Roomba 690 might be inexpensive, but it isn’t a thorough clean for carpeting.
Measure your home. As serious as a heart attack, you need to take a tape measure to your house. How many square feet is your home? You can look at your mortgage paperwork if you want, but remember this includes every floor area in your home. Your Roomba won’t be cleaning inside your closet or under that wall of bookshelves you have.
Raise Your Furniture
After you have the square footage, you need to measure your furniture. How high off the ground is that dresser? What about that sectional in the living room? Most Roomba’s are 3.6 inches tall. To effectively clean under beds, tables and TV stands, though, they need extra room.
The average is half an inch. That means if your dresser isn’t 4.1 inches off the ground, the Roomba will likely get stuck. Instead of giving up, you should think about purchasing furniture risers. You can get 1-inch risers that will hold dressers, TV stands, and other furniture pieces. You can get bed risers too to give your bed a slightly larger lift.
[easyazon_image align=”none” height=”427″ identifier=”B07K39B2XF” locale=”US” src=”https://smartrobotichome.com/wp-content/uploads/2019/09/311ZJsb46ZL.jpg” tag=”srh-easyazon-20″ width=”500″]
[easyazon_image align=”none” height=”339″ identifier=”B015HWXG4M” locale=”US” src=”https://smartrobotichome.com/wp-content/uploads/2019/09/41oXDRlDgdL.jpg” tag=”srh-easyazon-20″ width=”500″]
Cord Management Essentials
Cord management is something else to think about long before you bring your new robot home. If you have coax and HDMI cables hidden behind your entertainment center, it may be okay visually. However, if they are clumped on the ground where you can’t see, the Roomba will still find them.
The last thing you need is to come home to your Blu-Ray player laying on the ground because the cord got snagged. The same is true for those cords we use and leave laying around every day. Your phone charger cables, for example, or the power cords to your floor lamps, runners to the Christmas tree are always on the floor.
The best option is to purchase some cord management ties for your electronics. You can then get cable hiders for the power cords to your lamps. You might even think about upgrading to an extended phone charger cable so you can keep it off the ground.
Purchase Phase
Now that your home is ready for a robot vacuum and you have narrowed your choices down by the robots offering only the features you need, it’s time to buy.
But wait! There might be a chance to save a bit of money. Before you add the perfect Roomba to your shopping cart, we need to think about other purchases you will need, as well as when the best time to buy your robot.
Containment Options
There are three containment towers produced by iRobot. Each one has a slightly different way of containing your Roomba, and not all Roombas are fully compatible with all containment methods.
Dual-Mode Virtual Wall Barrier
The most popular option is the dual-mode virtual wall barrier. This battery-operated tower can be used in linear mode to block off doorways, entrances or sections of rooms. The infrared light extends straight out up to about 10 feet. In halo mode, the infrared light comes out as a ring around the tower in a 4-foot diameter circle.
This barrier is compatible with all 500, 600, 700, 800, 900, e, i and s series robots. You can also use as many as you want at once; there are purchase options of a single tower up to a 5-pack.
[easyazon_image align=”none” height=”500″ identifier=”B07SGPTHGJ” locale=”US” src=”https://smartrobotichome.com/wp-content/uploads/2019/09/41hawzb7AHL.jpg” tag=”srh-easyazon-20″ width=”500″]
[easyazon_image align=”none” height=”500″ identifier=”B07NKZM988″ locale=”US” src=”https://smartrobotichome.com/wp-content/uploads/2019/09/41nZdQroHyL.jpg” tag=”srh-easyazon-20″ width=”500″]
Automatic Virtual Wall
The automatic virtual wall uses a linear style infrared light. However, unlike the dual-mode option above, you can set the automatic wall and forget it. It will only come on when the robot gets close, blocking the path as intended. If you select manual mode, the infrared light will stay on for 135 minutes before shutting off.
This containment tower is compatible with the 500, 600, and 700 series robots. You can use as many as you want, though.
Virtual Lighthouse
The virtual lighthouses were the first containment options produced by iRobot, and they work to keep the robots confined to a room for a set amount of time. Acting as a gatekeeper these towers will shut off their infrared light after the timer is up (about 25 minutes) allowing the robots to leave the room and continue cleaning elsewhere.
These towers are compatible with Roomba 571, 572, 573, 780, 790, 877, and 880 models only. You should also only use two lighthouses at a time, so there is no need to purchase more than two.
Old School Containment
In the event you want to block off a single room, you can always just shut the door. Roomba robots are still incapable of turning a doorknob, let alone reaching one. However, we do have rooms without doors or spaces that need blocking off.
In these instances, you might have a baby/pet gate laying around that you can use. Heavy work boots will do the same thing, even weighted pool noodles. Anything you can find that the robot won’t be able to push past or break if it gets run into will work as containment.
They just won’t look as pretty laying around your home.
Replenishment Kits
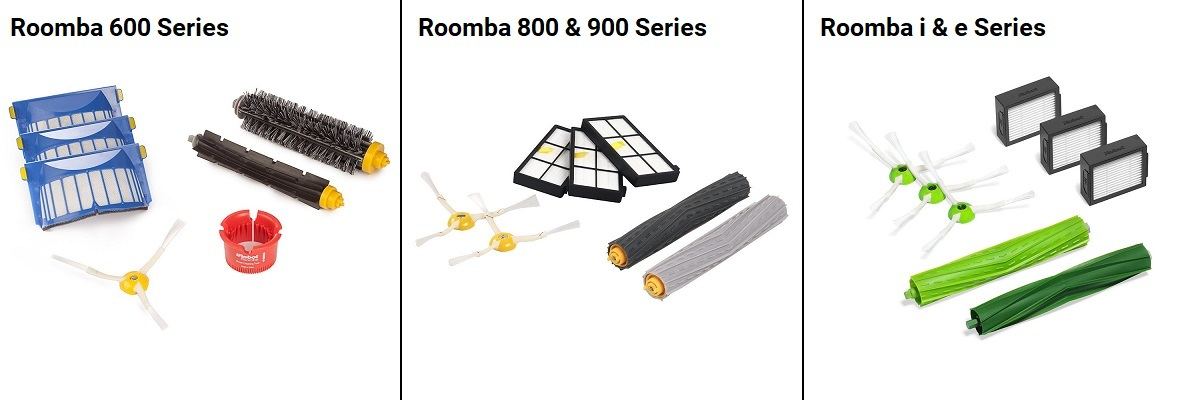
One thing you may want to think about adding to your cart is a replenishment kit. These kits will come with extra filters, side brushes, and extractor rollers for your robot.
Most of us aren’t as diligent at upkeep as we like to think we are. It is better to order the kits now while you are thinking about them instead of waiting until a part breaks or wears out. If you don’t have a replacement on hand, you will have to wait a while to get a new one. The robot will just sit, not doing its job, kind of like your Uncle Steve.
You want to get a compatible kit for your robot model. There are kits for the 600 series, 800 and 900 series as well as the i and e series models. There are also replicas. These are kits made by various third-party vendors. None of them are verified by iRobot, though and will void the warranty.
We advise that you wait until after your warranty period has expired before you purchase the “cheaper” options.
The Best Time to Shop
Ordering from Amazon is the easiest and most cost-effective method to get your robot and replenishment kits. There are particular times of the year when the best deals are out, though. If you are close to Black Friday sales or a Cyber Monday special, it is advised to wait for those dates.
You can save hundreds on a robot that you were going to purchase anyway. Unless you just have to have the robot right now, look at the calendar and see if any holidays are coming up. Amazon will usually have a special on certain Roomba models for the holidays.
After-Purchase Phase
Once you have the delivery and the box is sitting on your living room floor, you will want to tear into it. Before you do, we should cover a few things for the “just in case” periods.
If you purchased through Amazon, you would have a 30-day return policy. This will not count towards your 12 month warranty period. So you will have a month to decide if you like the robot or not (you will). You can return it through Amazon’s return policy without any questions for a full refund.
Which brings us to our first tip for this stage. Save the packaging. Just in case you get confused, I’ll say it again. Save the box and inner cartons. Put them up in the top of a closet, or out in the garage. Just hold on to them.
If you do have to return the robot, you will have to box it up. It is so much easier to use the original packaging than to find a new box that will fit everything without causing damage. Saving the box will keep you from getting frustrated, or making the return center question if you caused the damage (they can charge you for that, read the fine print).
Set Up the Robot
After you remove the packaging and have all the pieces laid out in front of you, it is time to put everything together. The first thing to do is to set up the Home Base charging station. Follow the instructions in the owner’s manual for proper setup procedures.
You then want to pull the tab on the underside of the robot to activate the contacts on the battery. The robot will need a proper charge (generally about three hours) on the Home Base before it can be used.
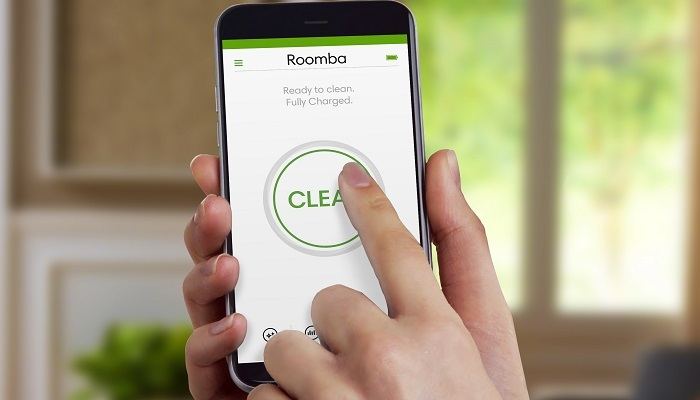
During the charging time, you can do other things. Download the mobile app, and set up that account, get the Amazon Alexa skills to use voice commands. You can also unpack and set up your virtual walls or put up that baby gate. After about three hours you will be ready to go.
It’s Time to Use the Robot
Now the fun part, the robot is active and cleaning your home. Here are some tips on what to look for or do during the first month you have the Roomba.
- Run the robot daily. This will help your floors get caught up to being cleaned regularly as well as keep the battery cycle going strong.
- Empty the collection bin after every cleaning cycle. Even if you have an extra-large collection bin, for the first few weeks, you will want to empty it after every outing.
- Follow the robot for a week to see where it goes, learn how it cleans or areas it may miss.
- For the following three weeks of this period, check on the robot after it completes a cleaning cycle to see the “habits” it has. It may not clean under the bed in the guest room, for example.
- Take the time to try out every feature of the robot, the mobile app, and each voice command. You may not use them all ever again, but you should be familiar with how everything works.
- Get in the habit of cleaning your robot regularly. Next, we will cover long-term care, so starting with a good cleaning habit is crucial.
Use What You Learn
After the first month, you will know more about your robot than most other owners that just let their robots go and hope for the best. Apply what you have learned.
For example, if the robot doesn’t clean under the bed in the guest bedroom, you will know to set up a containment wall to block the robot in that room at least once a week, so it cleans it thoroughly. At least then when your mother-in-law comes by unexpectedly, she will only complain about your cooking skills and not how messy her room is.
When you make a small mess trying to measure the pasta correctly, you will know how to use the spot clean feature. Now, instead of lugging out the monster upright from the closet for a 20-second clean-up, you can use your Roomba to get the job done without having to learn how to do it.
If you follow the tips above, after the first 30 days you will be less likely to want to return the robot. Instead, you will know what the Roomba is and isn’t capable of. Any situation that comes up will have you excited to use that one feature that never gets properly used, or that one command you have been dying to say to Alexa.
Now we need to make the robot last so you get your money’s worth.
Long-Term Care Phase
The longevity of your robot all depends on how well you plan and take care of it. There are three things you really need to pay attention to; the life of the battery, a proper maintenance routine, and knowing what to look for when it comes to replacing parts.
If you follow the tips outlined below, you, like many of the original 400 series Roomba owners, can have a robot that lasts over 20 years. Talk about a return on investment!
Caring for the Battery
The battery is one of the things that will need to be replaced eventually. We will cover that in a section below. However, you need to know that there are steps you can take to make the battery last longer. I am not talking about adding minutes to the runtime. Instead, we are talking about adding months to the time before it needs replacing.
Depending on the model you select, you will have either the large 3300mAh lithium-ion battery pack. Older models will use the 1800mAh lithium-ion or the replacement XLife 1800mAh battery.
You need to know which one you have so that when it comes time to replace it, you order the correct one. To prolong life, you should follow these steps:
Run the robot at least every other day. Constant drain and recharge will keep the battery healthy and allow it to maintain a charge.
Did you know you can place the robot in idle mode? If you aren’t using the robot for a week or more, you should use idle mode to preserve the battery. Your owner’s manual will tell you how to do this for your specific model.
Batteries Have Memories
Remove the battery charge memory. If the battery regularly gets recharged at 10% life remaining, it will only begin to use the remaining 90% of its capacity. It will then stop to renew at 20% remaining instead of 10%. This cycle will continue until the battery doesn’t hold a charge at all.
Once every four to six weeks, you should prevent the robot from recharging until the battery drains completely. Once it is dead, you can recharge. Doing this will remove that charge memory and allow the battery to remain charging to the maximum capacity.
Use proper care and maintenance routine. I will explain this below. Having a clean and optimal running robot will make the battery not have to work as hard. If the sensors are dirty or the wheels get stuck, the battery will have to work overtime, getting overheated and shortening the life.
Create a Maintenance Routine
A proper maintenance routine is crucial and quite easy (unlike replicating grandma’s quiche recipe).
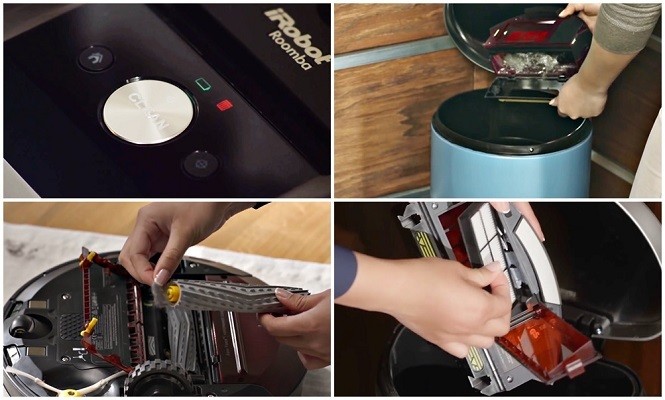
- Keep the collection bin cleaned. There is a sensor inside the collection bin that alerts the robot when it is full. If dust is allowed to build up around the sensor, it will give false readings. When you empty the bin, wipe it out of any dust or build-up with a dry cloth.
- Remove any hair, string or carpet fiber tangles in the side brushes and extractor rollers. These things rotate and will collect debris. Remove the rollers and clean them off thoroughly. Don’t forget to take the roller end caps off and clean out the tangles of hair found under them.
- Wipe the body and external sensors down. Just like inside the collection bin, the sensors will get covered in dust that needs to be cleaned off.
- Check the wheels once a week. When you do remove the extractors, you should also check the wheel axles for tangles and build up. Too much hair or string wrapped around the wheels can impede their movement.
- Bang the hell out of the filter. The filters in Roomba’s are not washable. However, you can get the big stuff off by smacking the filter against the inside of your trash can. Gently brush the filter off to remove any stuck-on debris and return it to service.
- Before you put the robot back on the floor, check it over for wear and tear. The sensors, bumpers, wheels, and brushes should all be checked to make sure they are in proper working order.
- Finally, double-check the airways to make sure there aren’t any clogs or build-up of hairballs preventing dirt collection from getting to the collection bin. If there are, stick a finger in there and pull them out.
When to Replace Parts
The last tips we have for you are to know when you need to replace worn parts. The maintenance routine you follow will help you determine if something needs to be replaced. However, you should also have a schedule.
The best action is to purchase a calendar and mark on it when items are expected to go bad. The filter is the most commonly replaced item, followed by the side brush then the extractors and finally the battery.
Any other items, such as the castor wheel or driving wheels, will only need to be replaced if there is a problem. I have made a chart with the various failed pieces and their expected replacement time so you can fill in your calendar.
| Item | Expected Replacement Time |
| Filter | 4 months |
| Side Brush | 9 Months |
| Extractors (Brush/Rubber) | 12 months/18 months |
| Battery | 20 to 36 months |
| Castor Wheel | As needed (rare) |
| Driving Wheels | As needed (once or twice per lifetime) |
| Cleaning Head | As needed (rare) |
Did I Miss Any?
What tips and tricks do you use to prolong the life and performance of your Roomba model? Did I miss something obvious?
Use the comment section below to share your tips with everyone else!