Is your Roomba not charging as well as it used to? You’re in the right place. Here is a list of things you should check to troubleshoot the problem.
1. Make sure there is power coming from the outlet (easiest to check)
Although it might seem obvious, I have been guilty of making this mistake in the past. It is the easiest thing on this list to check and should be the first thing you try. Either move your dock to a different outlet that you know is currently putting out power, or plug in something else to the dock’s outlet to make sure that there is power coming from it.
2. Clean the electrical contacts (most likely reason)
It’s possible that the electrical contacts on the Roomba need to be cleaned. As a device that encounters a lot of dirt and dust, the Roomba’s electrical contacts can become dirty and covered in a build-up of gunk over time.
Any buildup near the charging ports can interfere with the Roomba’s ability to establish a proper electrical connection. This will prevent the electrical current from flowing properly and stop your Roomba from charging.
To clean the electrical contacts, you have a couple options. The easiest is probably wiping the contacts with a cotton swab dipped in rubbing alcohol or a magic eraser.
Another way you can clean the contacts is to use a small brush (like an old toothbrush) and a can of compressed air. Hold the can of compressed air upright (if inverted, the propellant might spray out) n and spray it onto the contact points. You should see the dirt and gunk being blown away. Then use the brush to remove any stubborn residual dirt.
Make sure to clean both the contacts on the bottom of the Roomba and the contacts on the charging dock. Once the contacts are clean, try charging your Roomba again.
3. Reboot your Roomba
It’s possible that the charging problem might be in software rather than hardware. If that’s the case, rebooting your Roomba could get it working again quickly.
For series i and s Roombas, hold down the CLEAN button for 20 seconds. (For series j Roombas, hold down the CLEAN button for 10 seconds.) You will see the ring light begin to swirl. This means it is rebooting. This will take one to two minutes. Let it do its thing, when the light stops swirling, it means the Roomba has finished rebooting itself.
4. Factory reset your Roomba
If rebooting your Roomba didn’t fix the problem, you can take it one step further. Keep in mind that all your preferences and saved data will be erased and reset to factory default.
You can do this one of two ways: through the iRobot app or using the physical buttons on the Roomba itself.
To reset through the iRobot App, go to “Settings”, then choose “Remove/Factory Reset (your Roomba)”.
To use the physical buttons on the Roomba, follow the instructions below.
For the “e” series Roombas, hold down these 3 buttons together for 20 seconds: Home + Spot Clean + CLEAN.
For the “s” and “i” series Roombas, hold down these 3 buttons until you see a swirling ring of light around the CLEAN button: Home + Spot Clean + Clean.
For the “j” series Roombas, remove the dust bin and hold down the CLEAN button for 7 seconds until you hear a tone, then tap the CLEAN button once.
For the Combo Roomba: locate the reset button, it’s under the lid and to the left of the On/Off switch. Press and hold the button for ten seconds.
For more details, you can check out iRobot’s official help page on how to factory reset your Roomba.
5. Clean the wheels
If your Roomba is still not charging after trying all of the above, there is one other thing you can check. It’s possible that something is wrong with the Roomba’s wheels and they are causing the Roomba to not get seated properly on the charging dock.
To prevent unnecessary work, find out if the wheels could be causing the problem first by picking up your Roomba and manually lining up the electrical contacts on the dock with the contacts on the bottom of the Roomba. If the Roomba charges when you place it manually on the dock, then the problem is likely with the wheels. Clean the wheels to help prevent the machine from getting stuck and not lining up the contacts properly.
6. Take out the battery and reinsert It
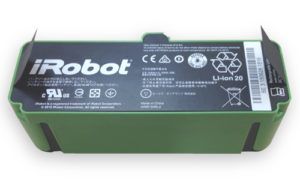
This step takes a bit of work, but if all else fails you can try taking out the battery and reinserting it. To remove the battery, flip your Roomba over and unscrew the screws holding the bottom cover. Remove the bottom cover and locate the battery, then remove the battery. Once the battery is out, wait a minute or two then reinsert it. Screw the bottom back on. If this still didn’t work, the next step might be required.
7. Check for damage
If your Roomba still won’t charge, then it’s possible that there is some damage to the charging port or the power cord. Inspect both the port and the cord for any signs of damage. If you see any, it’s likely that the Roomba will need repair. Unless you are comfortable doing the repairs yourself, it’s best to take the Roomba to an authorized iRobot repair center.
8. Contact iRobot customer support
If you’ve tried all of the above and your Roomba still won’t charge, the best thing to do is to contact iRobot customer support. They will be able to help you troubleshoot the problem.
Hopefully your Roomba is now charging properly again.
If you have any other tips or tricks, please leave a comment below!