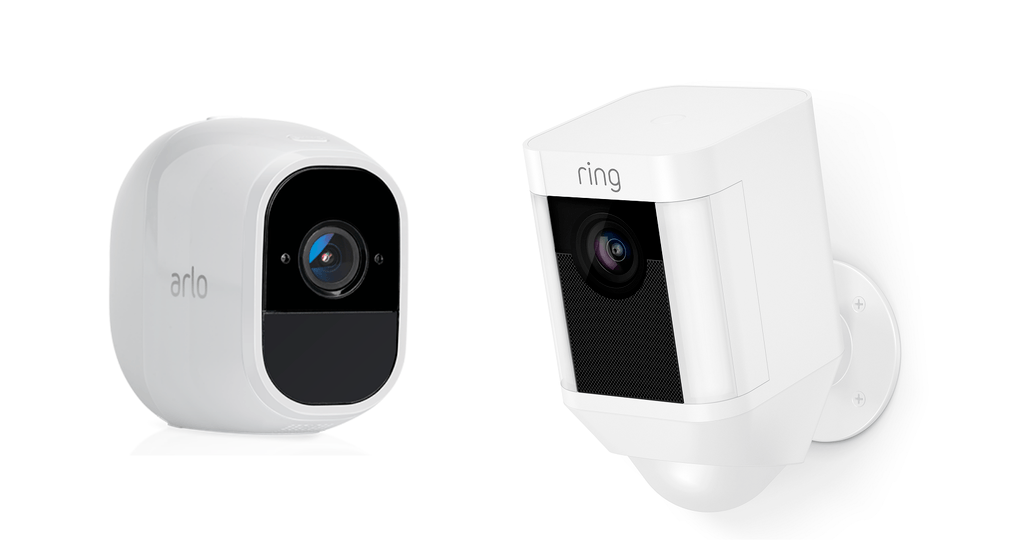
Home security is not only growing in popularity but thanks to DIY options and smart home integrations, it is also more affordable. The Arlo Pro 2 and Ring Spotlight are just two of the many options you have to consider.
Which one will take the top spot in today’s showdown? We will examine all the features and details of the two cameras, the extras, the add-ons and the internal workings to decide. Continue on to the article below to decide for yourself, or just trust my judgment and go with the Arlo Pro 2.
Contents
Differences between Arlo Pro 2 and Ring Spotlight
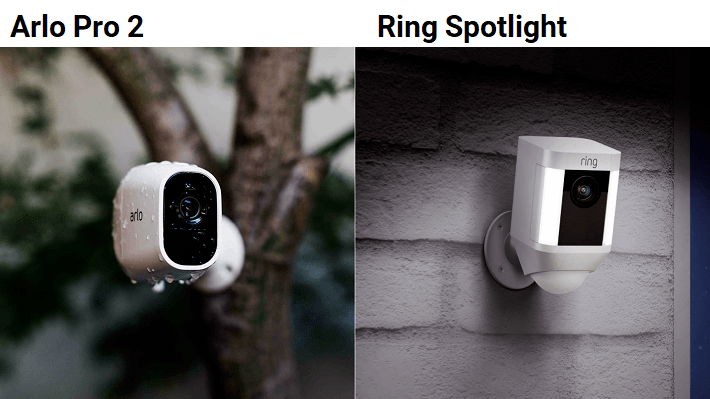
When it comes to what a security device can or cannot do compared to another, it may be the deciding factor in your purchase decision.
- The Ring Spotlight has a bright, concentrated light that is motion activated; the Arlo Pro 2 doesn’t have a light.
- You have the option for continuous video recording with the Arlo that you don’t have with the Ring.
- Arlo Pro 2 offers a three-second look back when reviewing live feeds; the Ring Spotlight doesn’t have this option.
- The Ring Spotlight only has cloud storage options where the Pro 2 has local USB storage capabilities.
- The field of view in the Ring Spotlight is 10 degrees larger than the Arlo Pro 2 field of view.
- Facial detection is available on the Ring that isn’t available on the Pro 2.
- The Ring Spotlight offers a lifetime replacement option if your camera is stolen. The Arlo Pro 2 doesn’t.
Similarities between the Two
When looking for specific options or features, knowing that both of your choices can accomplish a task or include a feature can be helpful.
- Both models come with a lithium-ion battery that lasts up to six months.
- Outdoor mounts are included on each of the cameras.
- Each of the cameras connects via your home wireless signal and network.
- Cloud storage is offered from both companies.
- The Arlo Pro 2 uses a mobile app for controls and settings just like the Ring Spotlight does.
- Both of the options here have infrared night vision modes.
- Motion and alert zones are used by both cameras.
- You can schedule the Arlo or the Ring using the mobile app.
- Both models have cameras that record in 1080p high definition.
- With built-in speakers and microphones, each of the models offers two-way communications.
- You have the option for live feed viewing on both camera setups.
- There is a local siren for both the Ring and the Arlo Pro 2.
Comparison Chart
Let’s compare the two devices side by side in a handy chart I created just for you.
| Arlo Pro 2 | Ring Spotlight | |
| Dimensions | 3.1×1.9×2.8 inches (Camera) 2.3 x 6.9 x 5.0 (Base) | 2.6×3.8×4.75 inches |
| Weight | 4.8 ounces (Camera) 11.1 ounces (Base) | 1 pound |
| Battery | Lithium-ion | Lithium-ion |
| Battery Life | Up to 6 months | Up to 6 months |
| Power Options | AC Adapter, Battery, Solar | AC Adapter, Battery, Solar |
| Outdoor Mount | Yes | Yes |
| Operating Temperatures | -4 to 113 degrees (F) | -5 to 120 degrees (F) |
| Continuous Recordings | Yes (Additional Purchase) | No |
| WiFi | Yes | Yes |
| Mobile App | Yes | Yes |
| Voice Commands | Yes | Yes |
| Smart Home Integration | Yes | Yes |
| Night Vision | Yes | Yes |
| Resolution | 1080p HD | 1080p HD |
| Field of View | 130 degrees | 140 degrees |
| Light Output | None | 4000 Kelvin bulb 700 Lumen |
| Motion Detection | Yes | Yes |
| Scheduling | Yes | Yes |
| 3-Second Look Back | Yes | No |
| Activity Zones | Yes | Yes |
| Facial Detection | No | Yes |
| 2-Way Communication | Yes | Yes |
| Live View | Yes | Yes |
| Storage | Cloud Storage (7 Days Free) | Cloud Storage |
| USB Backup | Yes | No |
| Siren | 100db | 110db |
| Lifetime Replacement | No | Yes |
| Price | Check on Amazon | Check on Amazon |
Features, Options and Dimensions
Let me take you inside the cameras for a detailed look at what is actually going on and what all those fancy words on the chart above mean.
1. Installation and Setup
One of the drawings (or even deciding) factors in a DIY security system is the ease of installation and set up. Both the Arlo Pro 2 and Ring Spotlight offer easy installation and set up. I will outline the procedures here, so you know if it is something you can handle.
If you are ever in doubt, you should always call a professional. When dealing with electricity, be sure to be aware of your surroundings and disconnect power sources prior to beginning work.
Setup and Install Arlo Pro 2
The Arlo Pro 2 system has several power options, including battery power. There are also two different mounting types. I will describe the magnetic mounting option hear for brevity. If you are mounting the device outdoors you should use the included outdoor mount.
- Connect the Base Station to your wireless router using the yellow ethernet cable.
- Attach the power adapter to the Base Station and plug it into the wall outlet.
- Turn the Base Station on.
- Download the Arlo App on your mobile phone and open it.
- Insert the batteries into your Arlo Pro camera.
- Log into the Arlo App and click “New System Set Up.”
- Choose the Arlo Base Station option. The app will find your base station automatically.
- Press the Sync button on the side of the Base Station. A green Led will begin to flash.
- Press the Sync button on the top of the camera and a blue LED will begin to flash.
- Once the camera is synced, the blue LDE will flash rapidly.
- Using the included screws (and drywall anchors if needed) secure the magnetic holder to the mounting surface.
- Once secure, place and position the camera to the magnetic base.
Setup and Install Ring Spotlight
The installation is similar because like the Arlo Pro 2, you aren’t hardwiring any power connections.
- Make a note of the circular protrusion on the mounting bracket. If installing on a wall, place the protrusion downwards. If mounting on a ceiling, the protrusion should be pointed in the direction you want the camera to face.
- NOTE: Optimal height is nine feet off the ground.
- Charge the battery pack(s) and insert them into the camera.
- Use the Ring mobile app and set up your Ring Spotlight prior to installation.
- Setup through the mobile app is a simple process that guides you through each step. Follow along and setup will be complete in less than five minutes.
- Place the bracket in the mounting position and mark the screw holes.
- If installing in wood, you can simply screw the bracket to the mount using the provided screws.
- If Installing in another surface type drill holes where you have marked and use wall anchors before screwing the bracket into position.
- Press the ball on the back of the camera into to socket on the mounting bracket until it clicks into position.
- NOTE: the motion sensor should be parallel to the ground.
- Adjust the camera to its proper position.
- Tighten the security screw to lock the camera in place.
- NOTE: For solar power option, mount the solar panel to the camera as instructed and use the Micro USB cord to connect the camera and solar panel.
Bottom Line: This is a tie. With installation and set up the entire procedure should take less than 20 minutes for each device.
2. Power Options
I talked briefly about the different methods of supplying your cameras with power earlier. Now I will go into a bit more detail with these methods.
The Ring Spotlight has three main power options. The primary option is by using the rechargeable battery pack. The camera itself will house two battery packs to give you the option to prolong the time between charges.
Using both batteries, you should expect about six months worth of battery life before you need to recharge. This is, of course, dependent on the number of alerts, motion detection and the length of time the camera is on and recording. The security light will also drain the battery the longer it remains illuminated as well.
The second option is a solar pack that will power the camera without the need for batteries. This is a separate purchase from Ring and does not come included in the purchase of a camera. However, if you have your camera mounted in a hard to reach place, this may be a good option, so you aren’t required to gain access to the camera to recharge the batteries.
The third option is through an AC adapter you plug into the wall. This option is not recommended though and should only be used when all other options are not viable. The reason is that of security.
You will have to plug the adapter into a weatherproof outlet which may be able to be accessed without being in the camera view. A would-be intruder would only have to come along and unplug your camera never to be seen.
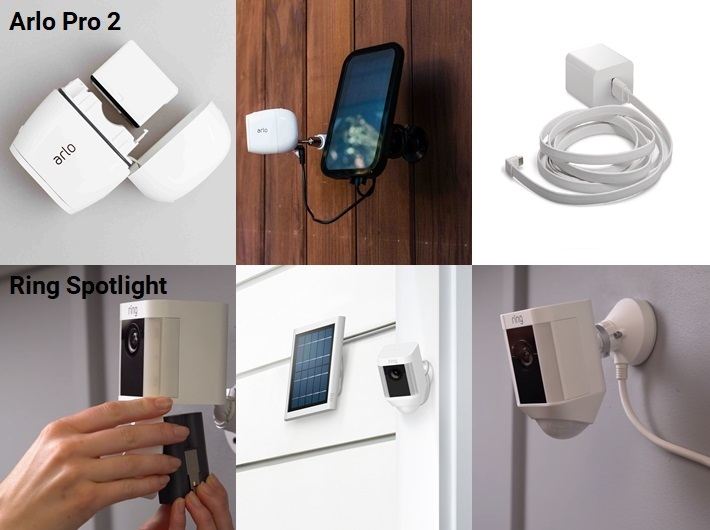
The Arlo Pro 2 has the same power options as the Ring Spotlight. The first, and always recommended is the battery power option. This, like the Ring, will give you up to six months worth of video recording life. Once again, though, this six month period is based on the number of times the the camera turns on to record. The more alerts, the more battery is being used.
You should also note, that if you decide to enable the continuous recording option (which I will talk about in a moment), you will need to rely on another power supply option. The camera will not give you the option for continuous recording if the battery is the only source of power.
You can use the AC adapter for power, though. If you do opt for continuous recording, this is the recommended option. You should note that installation will be a bit more difficult though. Since there isn’t a weatherproof adapter option, you will need to drill a hole through the wall to the outside for the power line to access the camera.
The other power option is also a separate purchase like it is with the Ring Spotlight. Arlo makes available a solar power panel that can power the camera without the need for any other power supply.
Bottom Line: This round is a tie. Each device has the same three power supply options.
3. Storage Options
With video recordings, you need to store them somewhere. Both Arlo and Ring offer you cloud services which come in various packages depending on the setup and even the number of cameras you have.
The Ring Video Recording Cloud has two plans. The recordings will be sent to the cloud for you to review, download or delete. Based on the plan you purchase, you will have different features and abilities.
The Basic Plan costs $30 per year or $3 per month, per camera. This price can add up quickly if you have multiple cameras installed. With the plan, though, you will be able to review, download, or share the videos for a 60 day period. This 60 day is per recording, based on the time and date it was uploaded to the cloud.
You also have the option for the Protect Plan. This plan offers you the same 60-day rotation and the same ability to review, download or share your videos. The Protect Plan costs $100 per year or $10 per month. This is not per camera though; it is for unlimited cameras. If you have more than three Ring Spotlights, it is beneficial to purchase this plan.
You also get a few bonuses with the Protect Plan. You get a 10 percent discount on future purchases through the Ring website and you also get total replacement warranty for each camera. This enables you to have a camera replaced in the event it is ever stolen.
For the Arlo Pro 2, you will have four cloud plan options. The first is free. It is a 30-day cycle plan for each camera that holds recordings for seven days. The videos are written over on the eighth day, however, you have the opportunity to review, download, save or share the videos during that time. This is per camera (up to five) and is always free.
If you have more than five cameras and less than 10, or you just want more features you can purchase a cloud plan from Arlo. The basic plan covers up to 10 cameras and you can pay $9.99 per month or $99 per year for the basic plan. This will give you 30 days of storage instead of seven.
The premium plan costs $14.99 per month or $149 per year and gives you everything the basic plan does. However, you will have the ability to hold recordings for 60 days instead of 30 and the plan will support 15 cameras (the amount a single base station will support) instead of 10.
Bottom Line: Ring Spotlight wins. Even with free storage from Arlo, free replacement of a stolen camera is a great option.
4. WiFI, Mobile and Voice Commands
Both of the cameras have wireless communications. This enables the cameras to connect to your wireless network and can, therefore, be controlled by connected devices. Each company has a mobile app for you to use.
[easyazon_image align=”center” height=”500″ identifier=”B0758L64L9″ locale=”US” src=”https://smartrobotichome.com/wp-content/uploads/2018/08/41Pi115aHL.jpg” tag=”srh-easyazon-20″ width=”500″]The Ring mobile app and Arlo mobile app are very similar. You will need the apps to set up the devices as well as control them. Through the apps, you can set your motion detection zones, enable alerts (you will get email and push notifications on motion detection) as well as use the app interface for a live look at the video feed.
Because of the two way communication, you will also be able to use your mobile device and the push-to-talk button on the app to speak to, and hear, whoever is in range of the camera. One other notable feature of the mobile apps is the ability to review recordings through your mobile device.
You also have the ability to view recordings on your television by using your voice. With smart home integration, you can use an Amazon Fire TV, Fire Stick or Echo Show to use voice commands to view the live feeds.
Both Arlo and Ring have Alexa commands you can sync through the various devices.
Bottom Line: This is a tie. While different in appearance and functionality, the mobile apps and voice commands work the same.
Frequently Asked Questions
I will answer some of the most common asked questions about the two devices here This way you will have all the information you need to make an informed decision. You’re welcome.
Q. How does night vision work with the cameras?
A. It works just like day vision, only at night. With infrared lights surrounding the lens, each camera will be able to detect movement and illuminate the area with the infrared lights. You will get the same alerts and the same recordings. However, depending on ambient lighting, the images will most likely stay black and white.
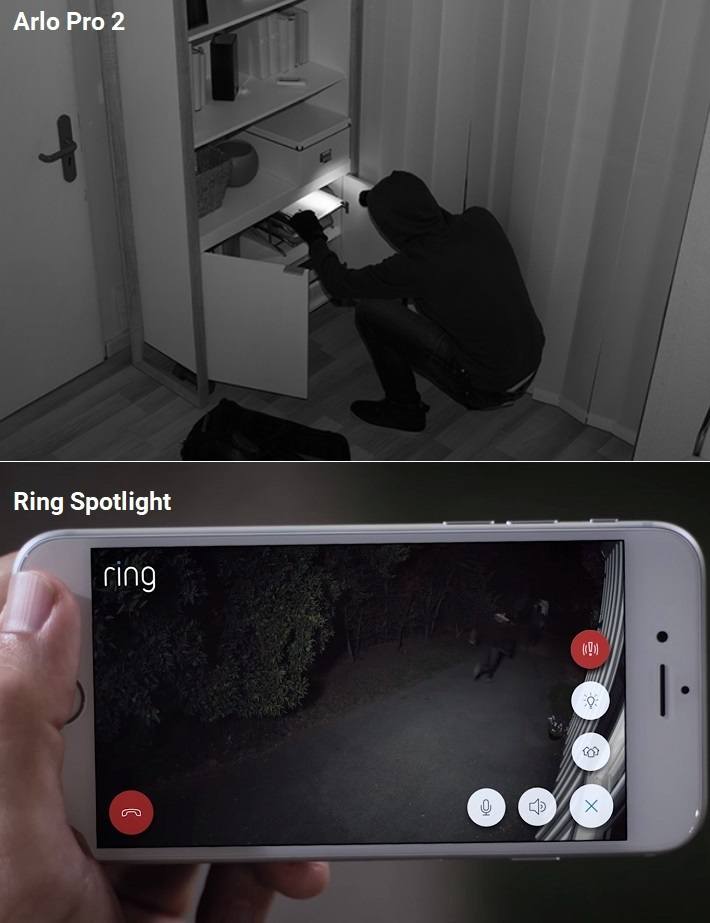
It is possible for the camera’s night vision to record in full color, though enough ambient lighting has to be surrounding the lens, not just the viewing area.
Q. What is Continuous Recording?
A. It is recording that continues on, forever. Or until you stop it. Or until a power outage prevents the camera from recording anymore.
Continuous Video Recording (CVR) is offered by Arol for the Arlo Pro 2 camera. With this, you will be able to record constantly as long as the camera has power and is connected to the network. You will have to pay extra for this service, though, as it doesn’t fall under the same cloud storage plan as regular recording clips.
You can get 24/7 recording storage for 14 days by paying $99 per month, per camera. You also have the option for 30 days of recording storage at $199 per month, per camera. This option isn’t really designed for home use, but instead for businesses who need constant coverage or entrances, safes, etc.
Q. What is the three-second look-back?
A. This is a feature from Arlo that helps alleviate some of the problems with cameras that only record on motion detection. From time to time these cameras can be slow to start up, preventing you from seeing the first couple of seconds.
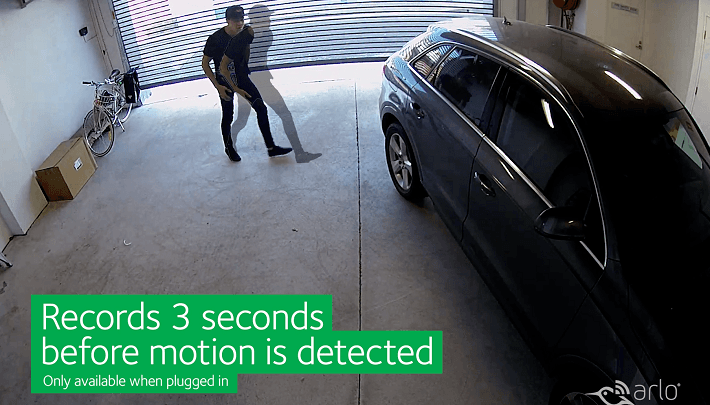
Sometimes, as when the camera is mounted on the front door, you may miss the person approaching the doorway. With the 3-second look-back, you will be able to review the recording and start the review three seconds before when the camera actually came on.
This is confusing but it is an option because of the CVR, the camera is always in an active state, even when it isn’t recording it is “watching,” and the recording, much like a DVR will allow for three seconds worth of previous footage to be saved.
What I Like About Arlo Pro 2
- Easy Setup and installation anywhere within wireless range.
- Multiple power options if batteries aren’t feasible.
- Continuous recording option.
- Free seven days cloud storage.
What I Like About Ring Spotlight
- The Light is bright and alarming, which can in itself, prevent an intrusion.
- Smart home integrations for multiple control points.
- High definition 1080p recording.
In Conclusion
It is difficult to really say which option is best for you or your situation. When it all comes down to the final decision, you need to decide if you want more mounting options, more cloud storage or if you want lights.
The Ring Spotlight offers you high definition recordings, decent cloud storage plans (though none are free) and the ability to have a security light where it is needed. This may or may not be enough for you though. The night vision works but isn’t comparable to the Arlo Pro 2, as the spotlight itself interferes with the infrared LEDs.
On the other hand, the Arlo Pro 2 offers superior night vision, easier installation and better cloud storage options. The downside in this comparison, though, is that the Arlo Pro 2 doesn’t have a security light. When it all boils down to that final choice, it really is up to you, light or no light.
I found, that for the money the Arlo Pro 2 offers better service, a more reliable image and recording and the ability to save the recordings locally put it just above the Ring Spotlight.
Click here to see all the security camera deals on Amazon today.
Excellent Review with valid points for both options.
Thx!
I have had the Ring Spotlight Cam for 3 weeks now, and found that the captured video is somewhat blurry (looked like a 720p instead of 1080p), and a reminder at the bottom of the screen about “soon to be expired free recording”. I hate the thought that after spending $200, I am now stuck for rest of the unit’s lifetime that I have to fork out more dollars for viewing video clips. Without it, the camera is useless for security purposes. I think Ring should imitate Arlo by providing 7 day free iCloud storage for free.
Am seriously considering to switch to Arlo Pro 2. Have another 1-1/2 weeks to decide for returning to Amazon.
Good review, “Commander Data” did you make the decision to switch to Arlos?
Very informative & helpful review. I was really confused on which system to get, but this comparison review helped me to focus on what’s most impirtant to me. Thought I needed the light on Ring, but would rather have better quality video day & night, as well as free cloud & local storage… I’m going for Arlo Pro 2. Thanks!
Fantastic break down of these products. Thanks for taking the time. I really like the Arlo Pro 2, but Ring now as a Floodlight Cam that you can hardwire in place right where a normal outdoor light would mount. That could really be the deciding factor for me.
Again, great write up. Easily the best I have come across.
Thank you for such kind words, Steve. I’m glad you liked the review!
Thanks for the review, ben looking at both options this week. Will likely go with Arlo.