Arlo, made by Netgear, has an impressive line up of home security cameras. Starting with the Arlo and continuing to the Arlo Pro, Arlo Pro 2 & 3, Arlo Ultra, and the Arlo Q. If you have the Arlo Pro or are thinking about getting it, the Arlo Pro 3 proves to be a better system.
How do the two compare? In this article, I’ll examine the Arlo Pro features and decide which version is the better option. Depending on your specific needs, wants, and desires, it could go either way. For the money, I feel you should go with the Arlo Pro 3 system. Read on to find out why.
Contents
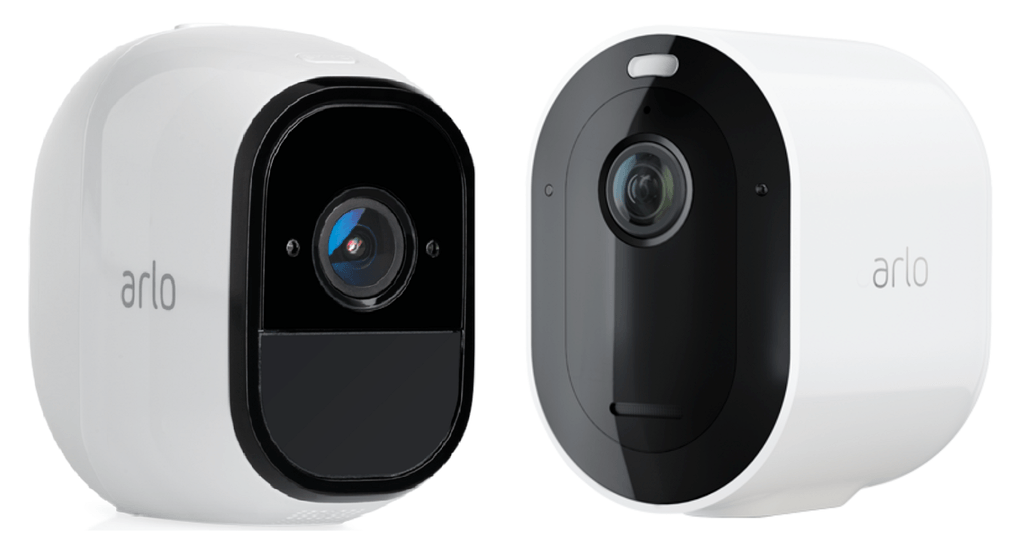
Differences between Arlo Pro and Arlo Pro 3
The Arlo Pro and the Arlo Pro 3 are going to be quite similar in many respects. However, there are enough differences that it could sway your opinion. Let’s see what those differences are.
- The first significant difference is in the recording resolution. Arlo Pro records in 720p while Pro 3 records in 2k resolution.
- Continuous recordings. With a subscription package and a hardwired camera, the Arlo Pro 3 allows for continuous recordings that the Arlo Pro doesn’t offer.
- Field of View. The Arlo Pro has a narrower field of view, at 130 degrees compared to the Arlo Pro 3’s 160 degrees.
- Battery charging. The Pro 3 uses magnetic charging that the Arlo Pro doesn’t have.
- The Arlo Po has a siren in the hub while the siren in the Pro 3 is in the camera itself.
- The Arlo Pro 3 comes with a spotlight that the Arlo Pro doesn’t have.
- Free 7-day storage. All Arlo cameras come with a free 7-day storage subscription, except for the Pro 3 (and Ultra).
Similarities between Arlo Pro and Pro 3
Aside from the list above and, of course, the price, the two cameras are pretty much identical. Here is a quick overview of the important features they have in common.
- Mount anywhere. Both cameras can be hardwired or battery operated and will work indoors and outside.
- Advanced detection. With a subscription, the Arlo Pro and Pro 3 cameras have advanced detection methods.
- Wireless connectivity. You can use your home wireless network to connect, view, and control the cameras.
- Mobile app. The Arlo app works with both models.
- Smart home integration. The Pro and Pro 3 work with Amazon, Google, IFTTT, Apple Home, and many others.
- Night vision. Each model has the ability to view and record in night vision.
- Storage. You can use an external storage device to save and view recordings.
- 2-Way communications. The Arlo cameras have a speaker and microphone that allow two-way communications.
- Motion Detection. You can set up motion zones to help reduce false alerts with motion detection sensors.
Specifications Chart
Now to see the two cameras side-by-side, you can determine if one is a better fit for your needs based on their exact parameters.
| Arlo Pro | Arlo Pro 3 | |
| Battery | Rechargeable | Magnetic charging |
| Battery Life | 6 months | 6 months |
| Power Options | Battery, Hardwired | Battery, Hardwired |
| Outdoor Mount | Yes | Yes |
| Operating Temperatures | -4 – 113 degrees F | -4 to 113 degrees F |
| Continuous Recordings | No | Yes |
| WiFi | Yes | Yes |
| Mobile App | Yes | Yes |
| Voice Commands | Yes | Yes |
| Smart Home Integration | Yes | Yes |
| Night Vision | Yes | Yes |
| Resolution | 720p | 2k |
| Field of View | 130 degrees | 160 degrees |
| Motion Detection | Yes | Yes |
| Scheduling | Yes | Yes |
| 2-Way Communication | Yes | Yes |
| Live View | Yes | Yes |
| Storage | Yes | Yes |
| USB Backup | Yes | Yes |
| Siren | Yes | Yes |
| Price | Check on Amazon | Check on Amazon |
Comparing the Arlo Pro and Arlo Pro 3
The basic comparison looks at how each camera performs. We will take it a step further and find out the best way to install each camera, the major features, and how they operate and which camera is more efficient with its included feature set.
Installing the Arlo Cameras
For the most part, you will install the cameras without wires. The Arlo Pro 3 takes advantage of this and allows you to recharge your batteries without taking the camera down (discussed in detail further below).
While both cameras allow for cabled or wireless installation, the wireless is easier, and the choice of most homeowners. For this reason, I will briefly cover the wireless installation steps. Refer to the owner’s manual for detailed instructions or to install with power cables.
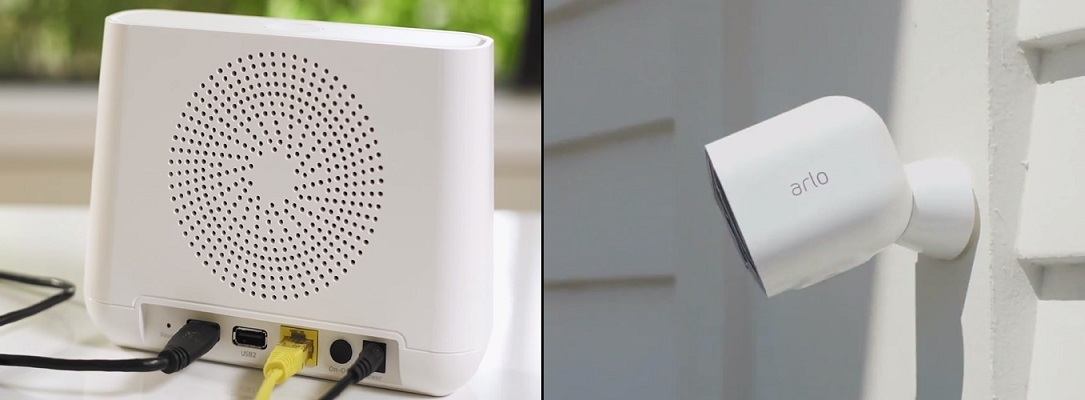
- Before you mount the camera, you will need to set it up at the wireless hub. Plug the hub into your modem with an Ethernet cable and then plug into an outlet to power on.
- Download the Arlo App, create an account or sign in to an existing one.
- Connect the app to the hub following the instructions on the app.
- Power on the camera by placing the battery inside.
- The app will prompt you through the initial camera configuration. Follow the steps until you can see the image from the camera on your smartphone or tablet.
- Sync your camera to the hub.
- Once everything is working, find your mounting location.
- Install the screw or magnetic mount. I recommended at least 9 feet high to prevent tampering. The owner’s guide recommends 7 foot installs.
- Install the camera to the mount and verify the image is still showing. If not, adjust the location. The wireless signal is good for up to 300 feet, line of sight.
- Attach the camera to the mount and adjust the angle to suit your needs.
You can get a more detailed explanation of the install process by watching this video:
Bottom Line: This is a tie. The cameras are almost identical in their installation. DIY install of a single camera should take less than 20 minutes.
Battery Power or Hardwired?
You have the option with both cameras to run a wireless system or to hardwire the cameras to a power cord. The choice comes down to ease of installation and mounting location.
Because the cameras are weather-proof, you can mount them outside on a fence, or a tree, or even the side of your home. If you do mount wireless and outdoors, you should use the screw mounting to prevent theft or tampering further.
Depending on how far you are from the house, a powered supply may not be optimal, since you will need to run a power cable to the camera. However, if you do decide to do this, the Arlo Pro will be a better option than the Arlo Pro 3.
Arlo Pro 3 Charges Batteries Differently
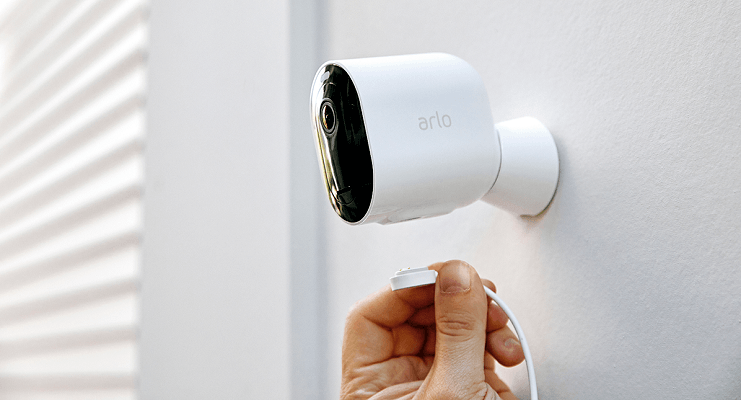
The Arlo Pro 3 uses a magnetic charging cable. It is a great feature that allows you to take the charging cable and stick it to the bottom of the camera where the battery compartment is located. It snaps into place and will recharge the batteries without you having to remove the camera or take the battery packs out.
As you can probably see, if you have an external camera running wireless communications and powered by battery, running a magnetic charger cable to the camera will prove just as difficult. Instead, the Arlo Pro requires you to remove the camera and the batteries to recharge them.
In doing so, you have two options. The first option is to pick a day and time when you are home to do the recharging. Each camera will take about three to four hours to charge the batteries fully. If you are home during the downtime, it won’t be as noticeable.
The second option is to purchase spare batteries that are charged and ready to go. Then you can easily replace the dead batteries with the new ones, and your downtime is minutes instead of hours.
Mounting Indoors? Use the Power Cord
[easyazon_image align=”center” height=”333″ identifier=”B07X36VWCT” locale=”US” src=”https://smartrobotichome.com/wp-content/uploads/2019/12/41qHZ9pOqOL-1.jpg” tag=”srh-easyazon-20″ width=”500″]Indoor mountings or those next to a window or doorway on the exterior, it is recommended to use the power cord install method. This is useful because you don’t have to rely on batteries to power your cameras, and you aren’t running extension cords through your yard.
Bottom Line: This is a tie. Depending on the mounting location, the style of the mount will vary. Both models have pros and cons to their mounting options.
Mobile App Use
When reading up on the Arlo cameras, you will see mention of the Arlo mobile app. You will then see words such as “optional,” “if needed,” and “not required.” I am here to tell you that trying to run the cameras without the use of the mobile app is pretty much impossible.
In effect, the use of the Arlo app is essential. It is required for set up and installation as well as scheduling, programming, and viewing. If you plan to utilize two-way communications, the mobile app is needed.
However, the app is a free download from either the iOS or Google stores and is quite nice to use. It is highly intuitive and user-friendly. The screens are easily navigated, and there is a help button always at the ready.
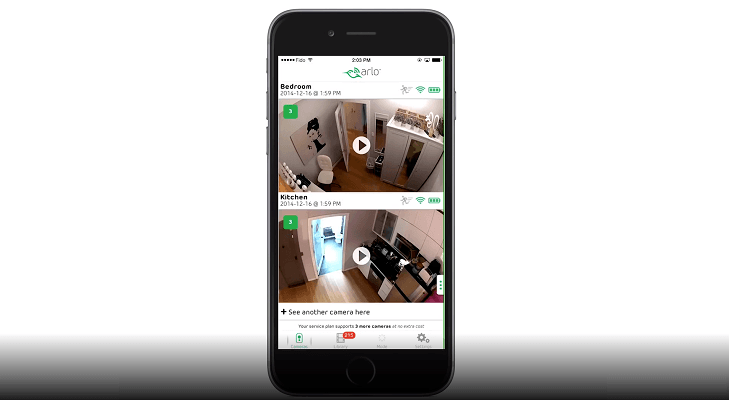
The image of your live view may be a bit small, but this depends on your phone’s size more than anything. You can also install the app on a tablet, or if you prefer, run the web version from your computer.
Smart Home Integration is Near Flawless
With the mobile app, you can also use smart home integrations. The Arlo cameras are compatible with almost every 3rd party integration out there. This includes Amazon Alexa, Google Assistant, Apple HomeKit, IFTTT, Z-Wave, ZigBee, and the list goes on.
Voice commands, showing the live feed on your tablet, phone, or TV (FireTV or Fire TV Stick required) as well as enabling or disabling the cameras based on your home security settings are all done through these integration methods.
The Arlo Pro 3 does have a small advantage, namely the detection zones that are a part of the subscription service. The Arlo Pro isn’t equipped for the use of detection zones, so it is an unfair fight. But, since you have to pay for the subscription to use it, out of the box, the cameras are the same.
Bottom Line: Another tie. Both the Arlo Pro and Pro 3 use the same mobile app. Arlo Pro 3 gets a slight nod for the added subscription features.
Resolutions, Recording, and Viewing
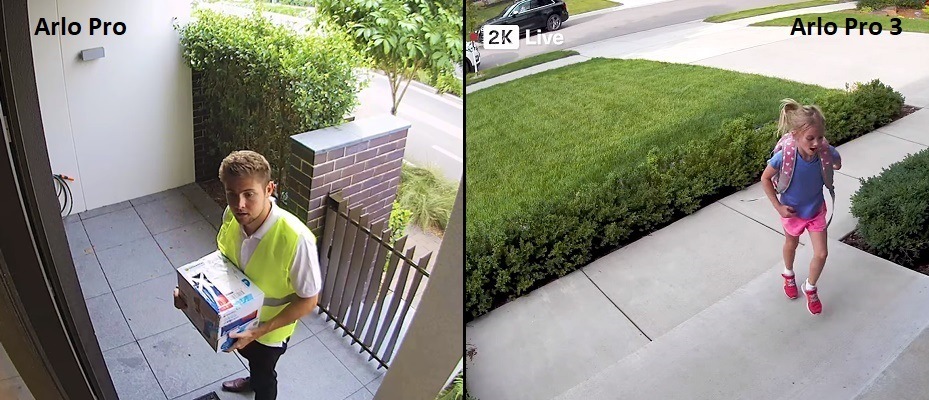
One of the biggest differences is in the resolution of the video feeds and recordings. The Arlo Pro records in 720p HD resolution that is suitable for most situations. The Arlo Pro 3, however, is a slimmed-down version of the Arlo Ultra and records in 2k HD resolution.
The difference here is going to be that of being able to see someone and tell what they are wearing and seeing someone and being able to tell how many wrinkles are in their shirt. As long as you have a device capable of viewing in 2k, then the Arlo Pro 3 is worth it.
Recordings go through the hub and can be stored locally. Again, there is a difference here. The Arlo Pro base hub is a newer version of the Arlo Hub and has some other features, but still relies on USB dongles cards for local storage. While it can store large capacity, they are meant more for backup instead of local storage.
The Arlo Pro 3 uses a newer version of the base station called the SmartHub. Along with other advancements, the local storage is now MicroSD, with a maximum capacity of 1 Tb.
Once you have your recording started, the camera will alert you to the motion detection. The app will send a push notification, and you can log in to see the live feed or interact through the two-way communications. The hub will store the video clip on your local storage or upload it to the cloud (cloud services covered below).
Bottom Line: The Arlo Pro 3 wins. With better resolution, more local storage space and the ability to use the newer SmartHub, the Pro 3 is the much better option.
Cloud Services
Each Arlo camera comes with a free subscription to the 7-day storage system. This allows your cameras to record to the cloud where you can view, review, and save clips. This also includes two-way communications, live streaming, smart home integration, and local storage.
Keep in mind that while each camera comes with this out of the box, the free plan is only capable of supporting 5 cameras per address and account. Also, note that the Arlo Pro 3 doesn’t offer the rolling 7-day recording (higher resolution), so you will need to purchase a higher tiered plan.
The Arlo 3 Pro does come with a 3-month trial of Arlo Smart, though, so you get 90 days to try the service before you need to pay.
Because of the Arlo Pro 3 and Arlo Ultra abilities, Arlo has adjusted their tiers and plans. There used to be three plans, and everything was simple. Now it is a bit more complicated. In short, the Arlo Pro 3 can have added abilities to hold 10, 15, or 20 cameras on the system, enable detection monitoring, and have rolling storage for either 30 or 60 days.
Arlo Pro can have all of that except the detection monitoring. Detection monitoring is a smart algorithm that will tell you what caused the alert. Person, vehicle, animal, or package alerts are included. The package alert is when a delivery is left at your door, and the process works but is still in Beta testing phases.
The Arlo Pro 3 can also take advantage of the continuous recording where the recordings of the camera are saved 24 hours a day, 7 days a week. This can be purchased per camera and for either 30 or 60-day rollovers.
For a full break down of the now confusing system, you can check out the chart on the Arlo subscription page.
Bottom Line: The Arlo Pro 3 wins. Even though you can’t store recordings on the free subscription, the Smart Plan is affordable and unlocks features the Arlo Pro doesn’t have.
Unique Features
The Arlo Pro 3 has a few advancements on the Arlo Pro that you may be interested in knowing about. While these won’t make or break your decision, they can go towards confirming your final choice.
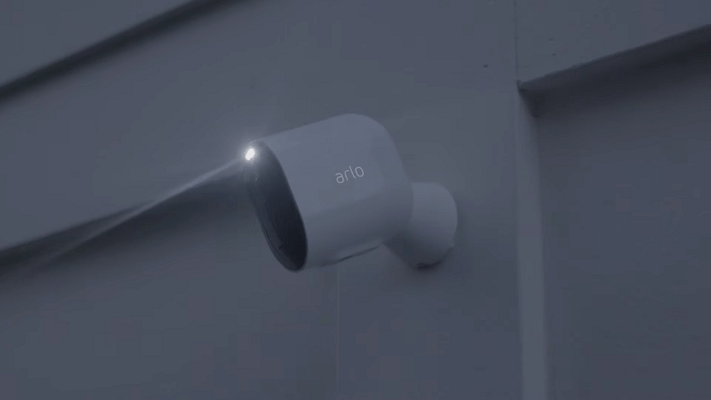
For instance, the Pro 3 has an LED spotlight that can be activated manually, or on motion detection. It is a great deterrent when activated, especially when paired with two-way communications. The Arlo Pro doesn’t have a spotlight.
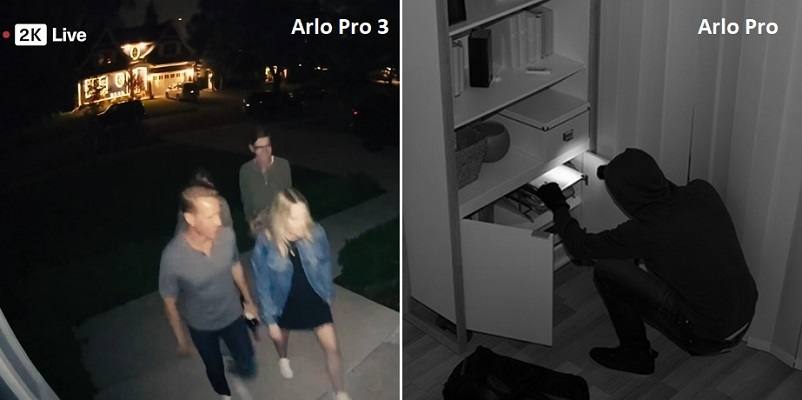
Both cameras do have night vision. Both use LED infrared lights with IR cut-off filters to prevent infrared shadows. The Arlo Pro is effective up to about 25 feet, where the Pro 3, because of the higher resolution, can detect movement in the dark up to almost 50 feet.
Once activated, though, both cameras alert the same, record the same, and you won’t get a better image on the Pro 3 until the object moving around comes within 25 feet. The difference is that the Arlo Pro 3 will know it is there first.
The Pro 3 also has a wider field of view. 30 degrees may not sound like a lot, but when you have multiple cameras and mount them within the same range, you will need fewer cameras to prevent blind spots.
Bottom Line: The Arlo Pro 3 wins, easily. Better coverage, higher quality night vision, and a spotlight make the Pro 3 a better camera.
Frequently Asked Questions
Now I will take the time to answer a few of the more common questions surrounding the Pro and Pro 3 cameras.
Q. Does either camera offer PoE?
A. Power over Ethernet is a combination of power and internet connection through the use of an Ethernet cable. Neither the Pro nor Pro 3 offers PoE support. The only Arlo camera to do so is the Arlo Q.
Q. What kind of internet do I need to run these cameras?
A. You will need a broadband connection. Dial-up simply will not work. You will also need a wireless router so the cameras can connect to your network. Other than that, all you need is an upload bandwidth of at least 1MB/s.
Q. Do the cameras come with a siren?
A. Yes, both the Arlo Pro and Pro 3 systems have sirens. Each one is about 100dB loud and is quite piercing. The difference is that the Pro system has the siren located in the base hub while the Pro 3 system has the sirens in the camera themselves. The Pro uses the siren as more of an alert, while the Pro 3 uses it more as a deterrent.
Q. Are the cameras interchangeable?
A. Yes, the Arlo Pro cameras will work on the SmartHub base, and the Pro 3 cameras will work on the Arlo Pro hub. However, you won’t be able to use the Smart subscription features with the Pro 3 cameras unless they are connected to a SmartHub. It is better to use the SmartHub and connect older Arlo Pro cameras to it than the other way around.
What I Like About the Arlo Pro
- Hardwired or battery mounting options.
- Long battery life.
- Simple DIY setup and installation.
What I Like About the Arlo Pro 3
- Spotlight, detection zones and smart features included.
- 2k resolution recording and viewing.
- Magnetic battery charging.
Conclusion
Arlo continues to push out new cameras for their line up, and each one is better than the last. While they may not have facial recognition like Nest Cam IQ, you won’t find any of the available features lacking.
For a simple set up with a few cameras mounted outdoors, the Arlo Pro system is hard to beat. However, if you are looking for a more secure setup, the Arlo Pro 3 offers you in-camera sirens, spotlights, and true high-definition 2k resolution. For the cost, the added features are hard to beat. If your final choice is between these two models, choose the Arlo Pro 3.