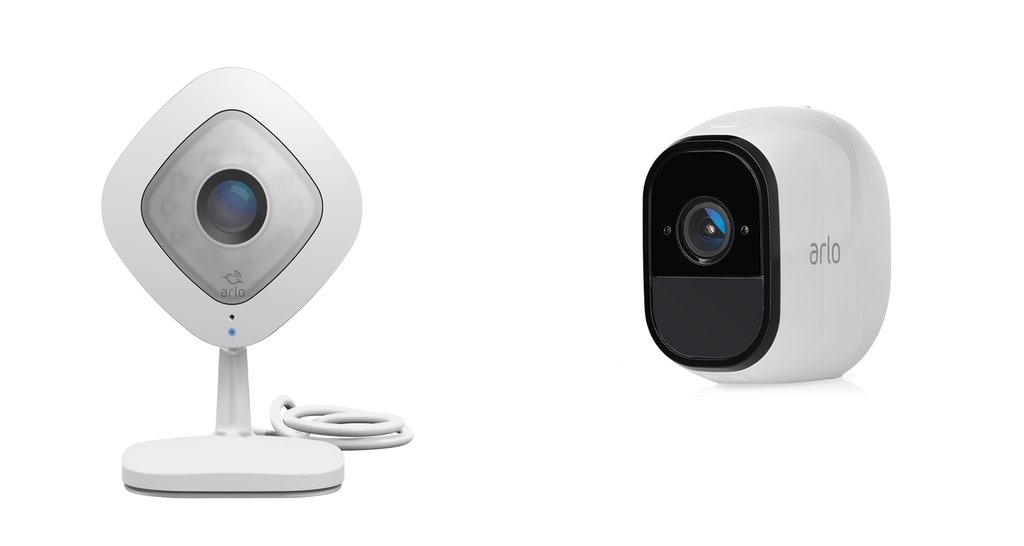
Netgear Arlo security cameras are some of the best on the market today. Based on sales, reviews, and return purchasers, Arlo has the highest rating and has satisfied thousands of camera owners for years. The Arlo Pro and the Arlo Q are two of the most popular from the Netgear line up.
So, which one is better? In this article I will compare the two cameras and explain their differences and similarities. I will also cover all the features and options in detail and tell you what I like about each one. Continue on to the entire article below to get all of the details. Or, if you just want to know: The Arlo Pro is my choice for the better option over the Arlo Q.
Contents
The Differences
Some differences are larger than others, but even the small ones may make or break your decision.
- The Arlo Q is hardwired only where the Arlo Pro is wireless with a hardwire option. This is the main difference.
- Arlo Pro is weatherproof and rated for outdoor use. The Arlo Q is not.
- The Pro records in 720p where the Q records in 1080p.
- You are required to have a base station with the Pro while the Q acts as its own base.
- There is no audible siren on the Arlo Q; the Arlo Pro has a 100db siren at the base.
- Arlo Q offers continuous video recording, the Arlo Pro does not.
- The Arlo Pro has an automatic sleep mode to conserve energy; the Arlo Q does not.
- To prevent delay, the Arlo Pro offers no solution; the Arlo Q with CVR doesn’t have delay.
- Arlo Q does not offer clip storage or back up; the Arlo Pro has a USB storage option.
- The Arlo Q only has one power option where the Arlo Pro has three options, including solar power.
The Similarities
Often times it will come down to knowing if one model can do something the other can. Here is what these two cameras have in common:
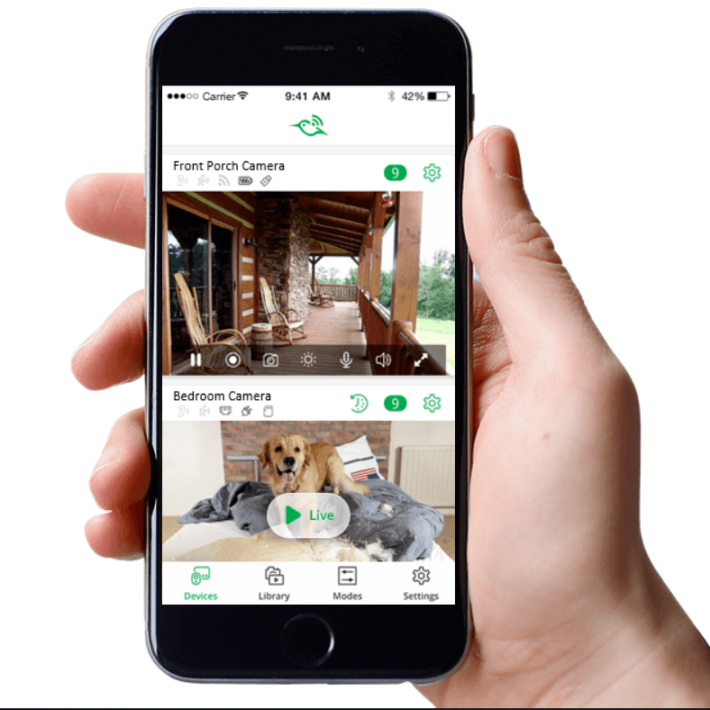
- Both cameras utilize the Netgear mobile app.
- Each one uses customized motion and detection zones.
- The Arlo Pro and the Arlo Q each have a 130 degree field of view.
- With a speaker and microphone in each camera, they both have two-way communications.
- Night vision and recording are available on the Pro and the Q.
- Both make use of the Netgear free online cloud storage.
- Each of the cameras are compatible with many 3rd party devices such as Amazon Alexa.
Complete Comparison Chart
Let’s take a look at this beautiful chart I slaved over for you to see these two cameras side by side.
| Arlo Pro | Arlo Q | |
| Resolution | 720p | 1080p |
| Power Supply | AC, Battery, Solar (separate purchase) | AC power |
| Night Vision | Yes | Yes |
| Base Station | Separate Unit | All-in-one |
| Siren | Yes | No |
| Cloud Storage | 7 Day Free | 7 Day Free |
| Continuous Recording | No | Yes |
| Mobile App | Yes | Yes |
| Two-way Communication | Yes | Yes |
| Weather Resistant | Yes | Yes |
| Field of View | 130 degrees | 130 degrees |
| Motion Zones | Yes | Yes |
| Sleep Mode | Yes | No |
| USB Backup/Storage | Yes | No |
| 3rd Party Integration | Yes | Yes |
| Delay Resolve | No Solution | No Delay (When using CVR) |
| Price | Check on Amazon | Check on Amazon |
Features and Options Details
Let’s dive deep into the features of each of these cameras and see which one, the Arlo Pro or the Arlo Q is better in that particular area.
1. Installation
The installation process has been streamlined by Netgear and is arguably the easiest installation on the market for security cameras. Let’s look at the installation process of the Arlo Q first.
Before we begin the installation, ensure you have your mobile phone ready, your home network and internet are on and active and you have unpacked the camera system and have all the components ready to go.
- Using the USB power cord and adapter, plug the cord into the adapter and the receptacle on the back of the camera. Now plug the adapter into the wall outlet. You will notice that as the camera powers up, the LED light on the front will turn amber.
- On your mobile phone, download the Arlo app from the store (iOS or Android markets). Once the app is installed, open and run the app.
- In the app select “New system start up”* and find Arlo Q from the menu choices; select the camera. You will be given a series of quick set up instructions to link your app to your home WiFi network.
- Once the app verifies it is connected to your network you need to sync your camera to the app. Find the triangle sync button on the side of the camera and press it in until the amber LED turns blue and begins to blink.
- Press “continue” on the mobile app and the app will search for the sync signal from the camera. When found, the app will display a QR code on the phone screen. Position the screen in front of the camera (about 8 inches away) and the camera will see the QR code. You will hear an audible chime when it connects.
- *If you have an existing account with the Arlo app already, instead of selecting “new system start up” in step 2, log in to your account and select “add new device” from the menu. The steps are the same from that point forward.
Your Arlo Q is now set up. You should do the installation on a flat surface near your router. Do not install the camera in it’s final mounting spot until it is connected first. This will prevent you from having to remove the camera or re-position it later.
Now let’s go over the installation procedure for the Arlo Pro.
- Using the supplied Ethernet cable, connect one end to your Arlo base station and the other to your wireless router or modem.
- Connect the power adapter to the base station and plug the adapter into the wall outlet. Next to the power supply port on the base station is the power switch. Press it to power on the base station.
- Download the Arlo App from your app store (iOS or Android markets). Once installed, run the app and choose “new system start up” or “log in” to create or access your account.
- Insert the rechargeable batteries into the Arlo Pro.
- On the mobile app, select Arlo Base station and allow the app to search and discover your base station signal. Bring your Arlo Pro to within three feet of the base station once the account on the mobile app has been set up.
- Press the triangle sync button on the side of the base station. The Sync status LED will begin to blink green.
- Press the oval sync button on the top of the Arlo Pro until it’s LED blinks blue. Sync is complete when the blue LED begins to blink rapidly. If you see an amber LED flashing, sync was not complete and you will need to start over with step 6.
Your Arlo Pro is now set up and can be set on a flat surface or mounted where you prefer.
Mounting the cameras is straight forward and simple. If you are mounting indoors you can place the Arlo Q on any flat surface, or use the provided screws and anchors to mount the bracket to a wall or beam and snap the camera base into the bracket.
If you are using the Arlo Pro, you may also use any flat surface as the camera has a flattened bottom. You can also mount the camera using the supplied screws, anchors and magnet sphere. The back of the camera has a magnet that will mount to the sphere in any position you prefer.
If you are using the Arlo Pro outdoors, it is suggested you purchase an outdoor mount as the magnet mount makes the camera easy to remove or steal.
[easyazon_image align=”center” height=”334″ identifier=”B01LR8PG52″ locale=”US” src=”https://smartrobotichome.com/wp-content/uploads/2018/05/51ap5XavcuL.jpg” tag=”srh-easyazon-20″ width=”500″]Bottom Line: This is a tie. Each camera has a very easy and straight forward install process and both will be completed in under 10 minutes.
2. Camera Specs
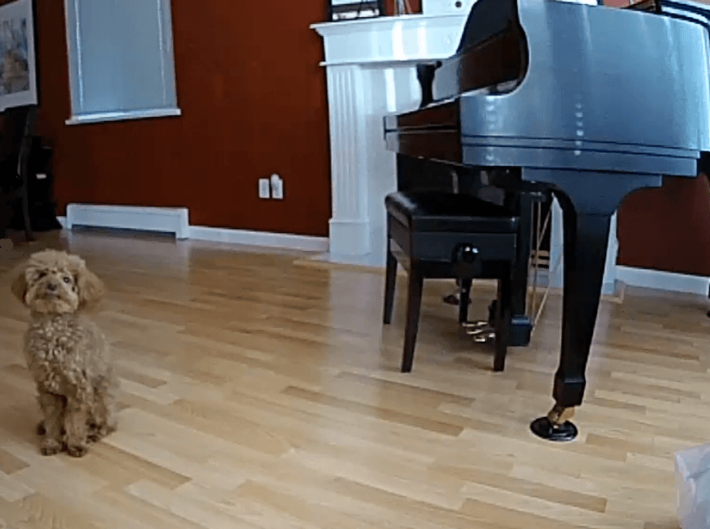
Both of the cameras being reviewed today come with some amazing features and specifications. Each camera, for example has an astounding wide-angle 130 degree field of view.
With this field of view you will have no problems seeing your entire entry way, front porch, driveway, living room or whatever you are trying to cover. It is recommended that you mount them higher to take advantage of the vision field. Seven to Nine feet has proven to be quite effective.
They also share the ability to record in low light situations. Each camera has infrared LEDs around the lens that provide great night vision. The Arlo Pro will produce nice images and recordings in very low light up to about 20 feet away. On the other hand, the Arlo Q, with higher resolution, will record in low light situations up to 35 feet away.
Testing this in the real world, the actual distance will depend greatly on the amount of light actually available. You will most likely end up with a black and white image from both cameras in serious low light. However, if enough light is present in the surrounding area you can record in full color.
The distance was optimal from ten feet to about 20 feet in both cameras, though, as one didn’t stand out over the other.
The resolution of the cameras is the main difference in the specifications. The Arlo Pro records in full 720p while the Arlo Q records in 1080p. While this sounds like a huge advantage for the Q, it really isn’t. Both resolutions are high definition, however, the Arlo Q has a deeper compression and the end result of the videos is visually the same.
There are instances though, were the 1080p resolution does show as superior. While these were mainly indoor, under full light conditions, it was there.
Bottom Line: The Arlo Q wins. Edging out the Pro with higher resolution.
3.Base Stations
The Arlo Pro makes use of a base station to send the recordings to the cloud storage. The base station sits within 15 feet of your router or modem and acts as the connection hub for your cameras. Each base station can hold up to 15 cameras and sync them to the cloud storage without issue.
The base station also has an audible siren that rates at 100 decibels. You can set this to on or off and even activate it manually using the mobile app.
The Arlo Q is it’s own base station. There is no need to try and sync the camera to an existing Arlo base station, if you have one. The camera will control all recordings, CVR and alerts right from its own case. There is not an audible siren however.
What the Arlo Q also lacks is a form of external storage. In the event of a power outage your Arlo Q will be down. The internal battery will hold the settings but is not powerful enough to operate the camera.
[easyazon_image align=”center” height=”375″ identifier=”B01LR8PG52″ locale=”US” src=”https://smartrobotichome.com/wp-content/uploads/2018/05/31B9WFlXwdL-1.jpg” tag=”srh-easyazon-20″ width=”500″]The Arlo Pro however, is completely wireless and will continue to record in the event of a power outage. You can also use the USB dongle to store up to 128 MB of recordings. This dongle plugs into the base station and when power and connectivity to the network resume, the base station will upload the recordings to the cloud.
Bottom Line: The Arlo Pro wins. Even with the need for a base station, the siren and USB storage make it a clear winner.
4. Two-Way Communications
Both the Q and the Pro have a built-in speaker as well as a microphone for communications. When the camera is activated, either manually or through motion detection, you have the option to use the mobile app to see, hear and speak to whomever is in range.
The audio is fairly clear through the app, depending on the speaker quality of your phone. The speaker in the camera is actually quite good and you will be heard. However, you should note that you will sound a little tinny or robotic as your voice must travel through your phone, to the base, over the wireless network and out the speaker. The loss isn’t anything to worry about though.
Because this works over the wireless network and through the mobile app, you don’t even need to be home to use it. You can be at work or our running errands and communicate with the mailman leaving a package on your doorstep.
Bottom Line: This is a tie. Both cameras offer the two-way communication.
5. External Use
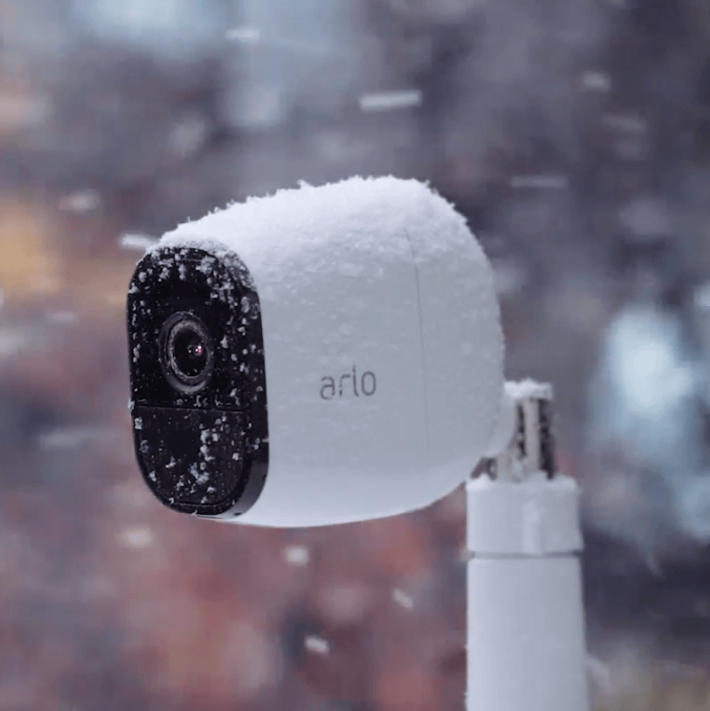
The Arlo Pro is weatherproof and water resistant, making it suitable for outdoor use. Being completely wireless means you don’t need to plug it in so there is no need to keep it close to an outlet or run extension cords. Although, you can.
The batteries on the Arlo Pro are rechargeable and do so quite quickly. You can also mount the camera inside as well. This allows you to maintain a single type of camera for your entire system, if you wish.
The Arlo Q is not rated for outdoor use and is intended for indoor use only. You can mount the camera outside, however it will void the warranty if you do.
Bottom Line: Arlo Pro wins. It is rated for outdoor or indoor use.
6. Sleep Mode and CVR
Arlo Q has the ability to run and record continuously. The feature is called Continuous Video Recording, or CVR. If you opt for this feature you will be required to pay for a monthly cloud storage plan. It is a nice feature, though, especially if you use the cameras in a business, office or a setting with a lot of foot traffic.
The Arlo Pro doesn’t have CVR capabilities. What it does have is a type of sleep mode to conserve the battery life. When there is no detected motion or audio, the camera will shut down. The motion sensors will stay active and when they detect motion or sound the camera will activate and begin recording.
This sleep mode saves the battery life and cuts down on the amount of recording file sizes that get saved to the cloud.
Bottom Line: The round is a tie. CVR with paid subscription or battery conservation with free storage is a personal call.
7. Cloud Storage
While we are discussing the CVR options, let’s talk about the cloud storage for a moment. With every Arlo camera you get a free rotating seven days worth of storage per month. What this means is, that for free, your recordings will be uploaded to the cloud service and stored for seven days. On the eighth day, the recordings will overwrite those from day 1.
If you decide to use the CVR option of the Arlo Q, you will have to pay for the continuous recordings. There are a couple of plans to choose from and you will be able to make the purchase through the website or the Arlo app.
If you do not opt for the CVR package and the seven day rotation is not enough, you can also upgrade the monthly free plan. Netgear offers two additional cloud storage plans. The first is a 30 day rotation plan that works the same as the free plan, only it doesn’t overwrite until the 31st day. This plan can be purchased for $3 per month, or $30 per year.
The second plan is the premium 30 day plan. It has other features such as live monitoring and will cost $10 per month, or $100 per year.
You should note that with the Arlo Pro, your base station will hold up to 15 cameras. The free 7 day plan will only cover up to 5 cameras. If you have more than five cameras, you will be required to purchase a monthly plan.
Bottom Line: Another tie. Except for the CVR, the storage options and plans are the same.
8. Power Options
Powering the cameras is pretty straight forward. If you have the Arlo Q, you have a single option: Plug in to an AC outlet. The Arlo Q doesn’t offer any other type of power supply option and is considered a wired camera for this reason, even though the recordings and communications are done through WiFI.
The Arlo Pro has three power options. The first is the 1005 wireless. It will run on four rechargeable 3V CR123A batteries. You also have the option to plug the camera into an AC outlet for power. Either option will work just fine, it just depends on if you want a power cord running through the yard or home or a wireless mounting.
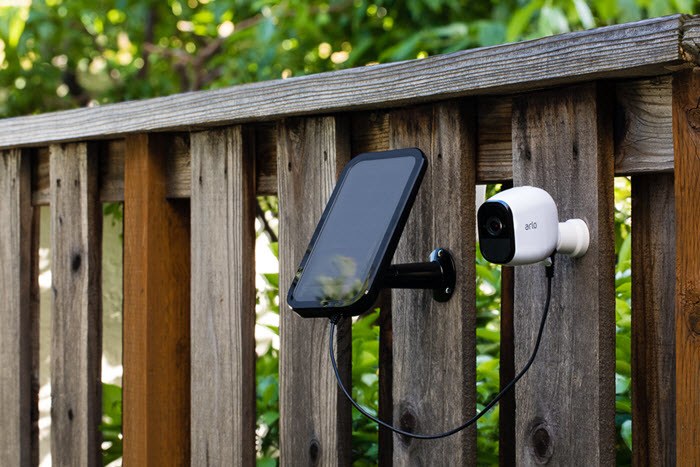
The third option is the use of solar power. The panel is an additional purchase but will allow you to not have to worry about power cords or recharging batteries. The solar panel mounts next to the camera and will supply enough power to run the camera for over 24 hours per charge.
Bottom Line: The Arlo Pro wins. Having multiple power options is better for the various mounting options.
9. Motion Zones
Another feature that both cameras offer is the motion detection zones. Each camera has the ability for you to adjust the sensitivity between low, medium and high. If you find that you are getting a lot of false alerts, you can adjust the setting to a lower sensitivity to address the problem.
Another thing you can do is set up manual zones using the Arlo app. Here you will be able to set an area within the field of view that will either detect or ignore the motion. For example, if your camera covers two doorways and you don’t need to worry if there is motion on one of them, you can set a zone over that doorway and turn it on to ignore mode. Any motion in this zone will not send an alert or begin the recording.
Likewise, you can block out streets, sidewalks, or any other motion area that you can safely ignore. The other option is to set a zone where any motion sends an alert and starts recording. You can shape and size these zones and turn them on and off in the mobile app.
Bottom Line: This is a tie. Both cameras offer the custom motion zone settings.
Frequently Asked Questions and My Answers
Love it or hate it, you will have questions about these cameras and I am here to answer them all for you. Let’s take a look at the most common questions.
Q. What is the actual battery life of the Arlo Pro?
A. Actually, until the batteries die. Netgear claims the Arlo Pro will have up to six months of battery life. This, however, will depend on a lot of factors. How many events are triggered per day? How long have you set the recordings for? What is the average ambient temperature around the camera?
Every time your camera comes on to record it will drain the battery. Will the batteries last a full six months? No. Let’s be honest. Even at an average of 4 to 6 alerts per day and the minimum recording time of 10 seconds, you are looking at four months tops.
Cooler weather will prolong the life and hot weather will drain them faster. The good news is that the batteries recharge really fast. Take a weekend day when you have nothing to do and will be home. Pull out all the batteries from your cameras and charge them. The process will take about 2 to 3 hours per camera at the most.
In all actuality, you can plan on a solid 3 months of battery life. All things considered, that isn’t bad at all.
Q. My internet doesn’t stay connected during bad weather. Will the cameras still record and save?
A. Yes! As long as the cameras have power they will record on motion or audio alerts. Storage is another matter though. If the internet is down, but the network is still active, the Arlo Pro will save the recordings to the USB dongle and when the internet returns they will be uploaded to the cloud.
The Arlo Q requires the Internet to send recordings and the network to send you alerts. So you will still be alerted to recordings, but there is nowhere for them to be saved to.
Q. Can I use these while camping?
A. Uh. Well. I mean. Camping? Okay, let me see if I can answer this. If your cameras are mounted at home and you want to monitor, record, or communicate, then yes. As long as you have a good signal on your mobile device that will work.
If you plan to take the cameras with you. Well, then I suppose you could You will need a power supply for the Arlo Q, as well as a wireless network. For the Arlo Pro you will need the network and a power supply for the base station. You will also need to re-sync the cameras and set them up for the new network.
Assuming you have all of this, are you really camping? If you are just watching the flap on your tent, then, you can, but I am not sure you should. By the way, the Arlo Q is not rated for outdoor use. So keep that in mind while you tromp through the wilderness.
Q. I caught a thief and the footage is on the cloud. The police are requesting a copy, can I download from the cloud?
A. Absolutely. You will have options on the web server to download and save clips to your computer. In this instance you absolutely should. You don’t want the evidence to be recorded over when the 7 days (or 30 for paid plans) are up.
Q. Will lights activate the camera?
A. Basically the answer you are looking for is yes. Lighting changes will activate the motion detection sensors in the cameras.
This will happen in situations such as turning on or off a light that is near the camera, car lights coming in through a window and reflecting off the glass or wall, or if a light comes on and casts a shadow in the field of view.
If this is a constant occurrence you can create a motion zone where the light reflects and set it to ignore. It will help cut down on the alerts you receive.
Q. What about recording through a window?
A. It won’t work very well. Some people have reported success in this situation. Maybe you have an Arlo Q and can’t mount it outside, or for some reason you don’t have the ability to mount an Arlo Pro outside. In any event, the camera will record, but you will get reflections in the glass that obscure the view. If you place the camera flush, it will work better but the infrared will cast shadows and prevent you from seeing well.
There are some work-arounds, but nothing really works all that well that I have found. The best option, other than mounting the camera outside, is to try it. Make adjustments and see what happens. Disable night vision and hope there is enough ambient light to see clearly. It will be a trial and error thing.
Q. You mentioned that there was 3rd party applications that work with the cameras, can you explain?
A. Absolutely! All of the arlo cameras will work with a majority of third party apps such as Amazon Alexa. The list grows as more are connected and used. For Amazon Alexa you will need the Echo Show. This will enable the video to be broadcast on your television. You will be able to use the echo show for communications as well.
Google assistant, IFTTT, SmartThings hub and others are also able to connect to your cameras.
Q. What is Geofencing?
A. Geofencing is when you have the cameras set to activate or deactivate based on your current location. To be specific, your mobile phone’s location.
There will be a radius set up around the home that when your cell phone leaves this area the cameras will be in their active state. When you return inside the radius (come home) the cameras will deactivate.
This is handy when you are coming or going and don’t need to be sent alerts that there is motion at the front door because you know it is you.
What I like About the Arlo Pro
- Multiple Power options.
- Indoor or outdoor use.
- Customized motion zones.
- Two-way communications.
- USB storage in the event of internet outage.
- Sleep mode to save battery life.
What I Like About the Arlo Q
- No base station needed.
- Customized motion zones.
- Two-way communications.
- Simple set up and installation.
- Full 1080p recordings.
- CVR ability.
That’s A Wrap
Depending on your needs and expectations, the perfect Arlo camera for you will vary. From the Arlo Pro and the Arlo Q, the differences are vast and you have a lot to think about.
Should you go with the Arlo Q? If your cameras will be watching indoors, you don’t want a base station and you need the ability to record and stream constantly, then the Arlo Q may be your best bet. The installation is very simple and set up takes less than five minutes.
However, if you are looking for a camera that can be mounted outside, the Arlo Q isn’t going to work for you. The Arlo Pro, on the other hand, has the same simple set up and installation and can be used and mounted indoors or out.
The Arlo Pro also offers more options for power supplies and has the battery saving sleep mode. The 7 day cloud storage option will likely be plenty for you as long as you stay under five total cameras. If so you will never have to pay for cloud storage, which in the security camera world, is otherwise unheard of.
The versatility and ease of use both inside and outdoors, is the reason the Arlo Pro is my choice for the better camera today.